Filter out the gunk and grime to get your coffee maker sparkling like new! In this guide, we’ll cover the step-by-step process of cleaning your beloved coffee maker to ensure that every cup you brew is pure perfection. Say goodbye to bitter residue and hello to a fresh, clean coffee experience. Let’s dive in and make your morning routine as smooth as that first sip of java!
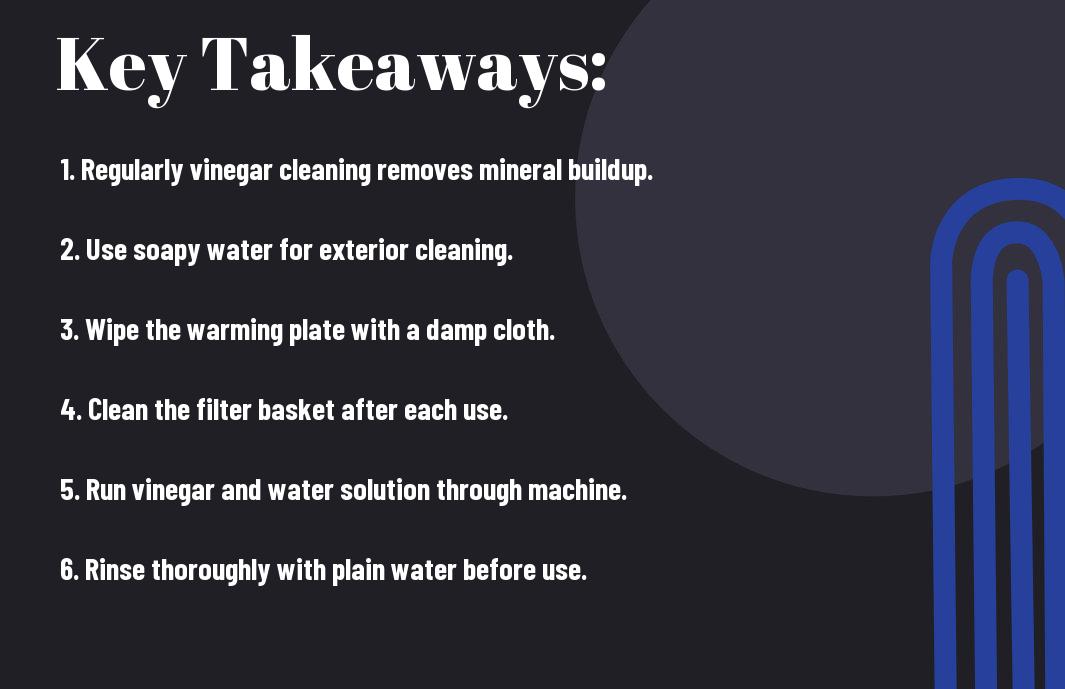
Key Takeaways:
- Vinegar is your best friend: Vinegar is the go-to solution for cleaning your coffee maker. It’s like the Windex in “My Big Fat Greek Wedding”, but for coffee machines.
- Don’t forget the carafe: The carafe deserves some love too. Give it a good scrub with warm, soapy water to rid it of any residue or stains.
- Regular cleaning is key: Just like changing your underwear, cleaning your coffee maker should be done frequently. It ensures your coffee tastes as good as a warm hug.
- Replace filters and parts: Don’t be cheap when it comes to filters and parts. A fresh filter and well-maintained parts make all the difference in brewing a delightful cup of joe.
- Enjoy the fruits of your labor: After you’ve cleaned your coffee maker, sit back, relax, and savor that first sip of freshly brewed coffee like it’s the elixir of life. You deserve it!

Preparation is Key
Gathering necessary supplies
On the journey to a sparkling clean coffee maker, it’s crucial to gather all the necessary supplies before diving in. You wouldn’t want to be left high and dry halfway through the process, now would you? Make sure you have white vinegar, water, dish soap, and a clean cloth or sponge at your disposal. Trust me, these items will be your trusty sidekicks in this caffeinated adventure!
Descaling or not to descale, that is the question
supplies. Ah, the age-old question – to descale or not to descale? That is the question perplexing coffee maker owners everywhere. Descaling is like giving your coffee maker a refreshing spa day, removing all the built-up mineral deposits and ensuring a smoother brewing process. If your coffee maker has been through the wringer and seen better days, descaling is the way to go. It’s like hitting the reset button, giving your beloved appliance a new lease on life!
Gathering all the necessary supplies and deciding whether to descale are crucial steps in preparing to clean your coffee maker. With a bit of foresight and a splash of determination, your coffee maker will be gleaming in no time!


The Deep Clean
Removing built-up grime and old coffee oils
For those hard-to-reach places where built-up grime and old coffee oils like to hide, a little extra effort is needed. Using a mixture of equal parts water and vinegar, run a cycle through your coffee maker. This will help break down any stubborn residue that has accumulated over time. Be sure to follow up with a few cycles of fresh water to rinse out any lingering vinegar smell.
Soaking the parts: a relaxing bath for your coffee maker
Grime, like an uninvited guest, can sometimes overstay its welcome in your coffee maker parts. To give them a proper cleaning, fill the sink with warm, soapy water and let the parts soak for about 30 minutes. This will help loosen up any dirt and grime, making it easier to scrub away.
Soaking the parts is not only an effective way to clean your coffee maker, but it can also be therapeutic in a way. Think of it as a spa day for your beloved appliance, allowing it to relax and rejuvenate before getting back to brewing your favorite cup of joe.
Scrubbing away the tough stuff
When the grime and residue are being particularly stubborn, it’s time to bring out the big guns – a gentle brush or sponge. Use these tools to scrub away any tough buildup on the various parts of your coffee maker. Pay close attention to the nooks and crannies where grime likes to hide, ensuring a thorough cleaning.
Scrubbing away the tough stuff may require a bit of elbow grease, but the end result will be well worth it. Your coffee maker will thank you by brewing up fresher, tastier coffee with each use.
Vinegar: The Miracle Cleaner
Your coffee maker works hard to brew you the perfect cup of coffee, but it also needs some TLC to keep delivering that delicious brew. Vinegar is the secret weapon you need to clean your coffee maker and keep it running smoothly. It’s a natural cleaner that effectively removes mineral buildup and bacteria, leaving your machine sparkling clean and your coffee tasting fresh.
Mixing the perfect solution
Any basic white vinegar will do the trick for cleaning your coffee maker. Simply mix equal parts vinegar and water to create a cleaning solution that will break down any buildup inside your machine. For a standard coffee maker, a mixture of one part vinegar to one part water is usually sufficient. If you have a particularly dirty or neglected coffee maker, you can increase the vinegar concentration for a more intensive clean.
Running the vinegar cycle
Mixing vinegar with water in your coffee maker’s reservoir and running a brewing cycle with this solution is the key to descaling and cleaning the internal components. The acidic properties of vinegar help dissolve mineral deposits, residual oils, and other impurities that can affect the taste and quality of your coffee. Make sure to run the vinegar cycle at least once a month to keep your coffee maker in top condition.
To start the vinegar cycle, pour the vinegar and water mixture into the reservoir and start a brew cycle as if you were making a pot of coffee. Allow the vinegar solution to run through the machine and then let it sit for about 15-20 minutes to break down any stubborn buildup. Afterward, run a couple of plain water cycles to rinse out any lingering vinegar taste before brewing your next pot of coffee.
Rinsing away the acidity
For a final touch, rinse the carafe, filter basket, and any removable parts of your coffee maker thoroughly with warm, soapy water. This will help remove any lingering vinegar smell and ensure that your coffee doesn’t taste like a salad dressing. Once everything is rinsed clean, wipe down the exterior of your coffee maker with a damp cloth to remove any vinegar residue and give it a polished finish.
Another tip to keep your coffee maker smelling fresh is to place a small bowl of baking soda inside the machine when it’s not in use. Baking soda is a natural deodorizer that can help absorb any odors and keep your coffee maker smelling clean between uses.

Baking Soda: The Natural Alternative
After brewing countless pots of coffee, your coffee maker might start to show some tough stains. Instead of reaching for harsh chemicals, consider using a natural alternative like baking soda to tackle the grime.
Creating a paste for tough stains
Tough stains on your coffee maker can be a headache to remove, but baking soda can come to the rescue. Mix a small amount of baking soda with water to create a paste-like consistency. Apply the paste to the stained areas of your coffee maker and let it sit for a few minutes to work its magic.
Letting it sit: the waiting game
Waiting for the baking soda paste to work its wonders is key to effectively removing tough stains. Allow the paste to sit on the stained areas for at least 15-20 minutes. During this time, the baking soda will help to break down the stains, making them easier to wipe away.
With a bit of patience, the baking soda paste can penetrate the tough stains on your coffee maker, loosening them up for easier removal.
Wiping away the residue
An necessary step after letting the baking soda paste sit is to wipe away the residue. Use a damp cloth or sponge to gently scrub the stained areas of the coffee maker. The baking soda paste should lift the stains, leaving your coffee maker looking clean and shiny.
Alternative
For a final touch, rinse the coffee maker thoroughly with water to ensure all traces of the baking soda paste are removed. Your coffee maker will be sparkling clean and ready to brew your next delicious cup of coffee!
Descaling: The Forgotten Step
Now, let’s talk about descaling, the often forgotten step in cleaning your coffee maker. Descaling is crucial for maintaining your coffee maker’s health and ensuring that it continues to brew delicious coffee without any issues.
Why descaling is crucial for your coffee maker’s health
To understand why descaling is so important, you need to know that mineral deposits from the water you use to brew coffee can build up inside your machine over time. These deposits can clog the internal mechanisms, affecting the taste of your coffee and even causing damage to your beloved appliance. Descaling helps remove these mineral deposits, keeping your coffee maker running smoothly and producing great-tasting coffee.
Choosing the right descaling solution
Choosing the right descaling solution is key to effectively cleaning your coffee maker. There are various descaling solutions available on the market, but it’s important to pick one that is compatible with your machine and gentle enough to not damage any components. Look for descaling solutions that are specifically designed for coffee makers to ensure the best results.
Forgotten
Running the descaling cycle is a straightforward process that can make a world of difference in the performance of your coffee maker. Most machines have a descaling cycle built-in, which can be activated by following the manufacturer’s instructions. This cycle helps to thoroughly clean the internal parts of your coffee maker and remove any built-up mineral deposits, ensuring that your coffee tastes fresh and delicious every time you brew a pot.
Running the descaling cycle
For best results, it is recommended to run the descaling cycle regularly, especially if you have hard water. Hard water can accelerate the buildup of mineral deposits inside your coffee maker, so descaling every few months can help prolong the life of your machine and maintain the quality of your coffee. Remember to follow the instructions provided by the manufacturer and use the right descaling solution to keep your coffee maker in tip-top shape.
Descaling is a vital step in keeping your coffee maker in top condition and ensuring that every cup of coffee you brew tastes perfect. Don’t overlook this important maintenance task if you want your coffee maker to continue serving you delicious coffee for years to come.
Reassembly and Maintenance
Putting it all back together again
Not sure how all those pieces you carefully cleaned go back together? Don’t worry, reassembling your coffee maker is easier than you think. Start by putting the filter basket and carafe back in place. Then, reattach any detachable parts like the water reservoir or drip tray. Once everything is back where it belongs, run a cycle with just water to make sure your coffee maker is functioning properly.
Tips for regular cleaning and maintenance
Any coffee lover knows that a well-maintained coffee maker produces the best brews. To keep your coffee maker in top shape, consider these tips for regular cleaning and maintenance:
- Regularly descale your coffee maker to prevent mineral buildup.
- Replace the water filter every few months to ensure clean, crisp coffee.
This will not only improve the taste of your coffee but also extend the lifespan of your beloved coffee maker.
Scheduling your next deep clean
Plus, remember to schedule your next deep clean to keep your coffee maker running smoothly. Set a reminder on your phone or calendar to descale, clean, and maintain your coffee maker every 1-3 months, depending on usage. By staying on top of maintenance, you’ll ensure that your coffee maker continues to brew the perfect cup every time.
With these reassembly and maintenance tips in mind, your coffee maker will be primed and ready to serve up delicious coffee whenever you need your caffeine fix.
Conclusion
From above, we have learned the important steps to properly clean a coffee maker. Remember to regularly descale your machine, clean the carafe and filter basket, and wipe down the exterior. By maintaining a clean coffee maker, you can ensure your morning cup of joe tastes its best every time!
So, grab your cleaning supplies and get to work – your coffee maker will thank you with a delicious brew that will kickstart your day in style! Happy cleaning!
FAQ
Q: Why is it important to clean a coffee maker?
A: Ah, the coffee maker, our faithful morning companion. It’s crucial to keep it clean to ensure that your coffee tastes fresh and delicious every time you brew a pot. Neglecting to clean your coffee maker can lead to a buildup of mineral deposits, oils, and mold, affecting the taste of your precious brew. So, don’t let your coffee suffer – clean that coffee maker!
Q: How often should I clean my coffee maker?
A: Ideally, you should give your coffee maker a good cleaning at least once a month. However, if you use your coffee maker daily, it’s a good idea to clean it more frequently. A regular cleaning routine will not only keep your coffee tasting great but also extend the life of your trusty appliance. Recall, a happy coffee maker makes for a happy coffee drinker!
Q: What’s the best way to clean a coffee maker?
A: Ah, the million-dollar question! Cleaning a coffee maker is easier than you might think. Simply mix equal parts water and vinegar and pour it into the water reservoir. Run a brewing cycle (without the coffee grounds) to clean out any built-up grime. Then, run a couple of cycles with just water to rinse out any vinegar residue. Don’t forget to wash the carafe, filter basket, and any removable parts with warm, soapy water. Voilà! Your coffee maker is squeaky clean and ready to brew the perfect cup of joe.
The Ultimate Guide to Brewing the Perfect Cup of Black Coffee at Home


