brew

How do you brew the perfect cup of coffee

Perfecting the art of brewing coffee is a task that requires precision and finesse. From selecting the right beans to mastering the brewing process, each step plays a vital role in achieving the perfect cup. In this guide, we will explore the important elements that go into brewing a flawless cup of coffee that will awaken your senses and elevate your coffee experience to new heights. Grab your favorite mug, and let’s look into the world of brewing perfection.

Key Takeaways:

  • Quality beans: Utilize high-quality, freshly roasted coffee beans for a flavorful cup of coffee.
  • Grind size matters: Adjust your coffee grind size to match your brewing method, ensuring optimal flavor extraction.
  • Water temperature: Brew with water at the correct temperature (195-205°F) to extract the best flavors from your coffee grounds.
  • Brewing time: Pay attention to the brewing time – too short or too long can impact the taste of your coffee.
  • Experiment and enjoy: Don’t be afraid to experiment with different brewing methods and ratios to find your perfect cup of coffee. Embrace the process and savor the results.

Choosing the Right Coffee Beans

Your journey to brewing the perfect cup of coffee begins with choosing the right coffee beans. The beans you select will greatly impact the flavor profile of your brew, so it’s crucial to choose wisely.

Selecting the Best Roast for Your Taste

Best start by considering the roast of the coffee beans. Roasts can range from light to dark, each offering a different flavor profile. Lighter roasts tend to be more acidic and showcase the unique characteristics of the beans, while darker roasts have a bolder flavor with more prominent notes of bitterness and smokiness. Choose a roast that aligns with your taste preferences to ensure a satisfying cup of coffee.

Considering the Origin and Quality of the Beans

One crucial factor to consider when selecting coffee beans is their origin and quality. The region where the beans are grown plays a significant role in determining the flavor profile. Different regions produce beans with distinct flavors, so exploring beans from various origins can lead to exciting taste experiences. Additionally, opt for high-quality beans to ensure a delicious and satisfying cup of coffee.

One thing to keep in mind is that coffee beans are typically categorized based on their quality. Specialty coffee beans are of the highest quality, grown in optimal conditions and meticulously processed to bring out the best flavors. Investing in specialty coffee beans can elevate your coffee brewing experience and result in a truly exceptional cup of coffee.

Grinding Your Coffee

Now, let’s talk about the crucial step of grinding your coffee beans. This step can make or break the flavor of your brew, so it’s important to get it right.

Why Freshly Ground Coffee Matters

Coffee beans start losing their freshness and flavor as soon as they are ground. By grinding your coffee just before brewing, you ensure that the maximum amount of flavor and aroma is extracted from the beans. This results in a more flavorful and satisfying cup of coffee that is worth the extra effort.

Choosing the Right Grinder for the Job

Grinding your coffee beans to the right consistency is necessary for a perfect cup of coffee. There are two main types of grinders to consider: blade grinders and burr grinders. Blade grinders are more affordable but can result in inconsistent grind sizes, affecting the taste of your coffee. On the other hand, burr grinders offer more precision and control over the grind size, leading to a more consistent and flavorful brew.

Your choice of grinder will depend on your budget and how much control you want over the grind size. If you’re serious about your coffee, investing in a high-quality burr grinder is the way to go for a truly exceptional cup of coffee.

Selecting the Perfect Brewing Method

After reading the insightful guide on How to Make the Perfect Cup of Coffee, the next crucial step is selecting the ideal brewing method. Different methods can affect the flavor profile and intensity of your coffee, so it’s vital to choose wisely based on your preferences.

Drip Brewing: The Classic Choice

The classic drip brewing method is a favorite among many coffee lovers for its simplicity and consistent results. This method involves hot water slowly dripping through a filter containing ground coffee, extracting the flavors and aromas along the way. Drip brewers are perfect for those who prefer a clean and smooth cup of coffee without much effort.

French Press: Rich and Full-Bodied

Press…

With its rich and full-bodied brew, the French Press method is perfect for those who enjoy a robust and flavorful cup of coffee. The process involves steeping coarse coffee grounds in hot water and then pressing them down with a plunger to separate the grounds from the liquid. This method allows for more oils and sediments to remain in the final brew, resulting in a bolder flavor profile that some coffee enthusiasts prefer.

Pour-Over: A Delicate Balance

Balance…

PourOver…

Measuring and Heating Water

Many believe that the key to brewing a great cup of coffee lies in the proper measurement and heating of water. Getting these elements right can make a significant difference in the final taste of your coffee.

The Importance of Water Temperature

Temperature Effect
Below 195°F (90°C) Under-extracted, resulting in a weak and sour cup of coffee.
195-205°F (90-96°C) Ideal range for brewing, extracting the flavors perfectly.
Above 205°F (96°C) Over-extracted, leading to a bitter and unpleasant taste.

For the best results, aim for a water temperature between 195-205°F (90-96°C) when brewing your coffee. This temperature range ensures that you extract the optimal flavors from the coffee grounds without overdoing it.

Measuring the Right Amount of Water

Right measurements are crucial for brewing a consistent and delicious cup of coffee. Using too much or too little water can throw off the balance of flavors and strength in your brew.

The key to measuring the right amount of water is to follow the coffee-to-water ratio recommended for your brewing method. Typically, a general guideline is to use 1-2 tablespoons of coffee for every 6 ounces of water. However, you can adjust this ratio based on your preferences for a stronger or milder coffee taste.

The secret to a perfect cup of coffee often lies in the details, such as measuring the right amount of water. Finding the ideal balance between coffee grounds and water will help you achieve the desired flavor profile and strength in your brew.

The Brewing Process

Steeping Time: Finding the Perfect Balance

Finding the ideal steeping time is crucial in brewing the perfect cup of coffee. Steeping for too long can result in an overly bitter and astringent brew, while steeping for too short a time may yield a weak and under-extracted cup. The key is to find the balance that suits your taste preferences.

Agitating the Coffee Grounds for Optimal Extraction

With each method of brewing coffee, whether it’s pour-over, French press, or espresso, agitating the coffee grounds plays a significant role in the extraction process. Gently stirring or swirling the grounds helps ensure that all the coffee is evenly exposed to the water, promoting a more consistent and flavorful extraction.

Another important aspect to consider is the intensity of agitation. Depending on the grind size and brewing method, the level of agitation required may vary. Experimenting with different agitation techniques can help you fine-tune your brewing process and achieve the perfect balance of flavors in your cup of coffee.

Tips and Tricks for Perfection

To brew the perfect cup of coffee, it’s vital to pay attention to the little details that can make a big difference. Here are some tips and tricks to help you achieve coffee perfection:

Experimenting with Ratios and Times

With coffee brewing, ratios and times play a crucial role in determining the flavor and strength of your cup. Experiment with different coffee-to-water ratios and brewing times to find the perfect balance that suits your taste buds. You may discover that a slightly longer brewing time or a higher coffee-to-water ratio enhances the flavors and aromas of your coffee.

The key is to be patient and open to trying new combinations until you find the ideal ratio and brewing time that brings out the best in your coffee. Do not forget, practice makes perfect!

Storing Coffee Beans for Maximum Freshness

With coffee beans, freshness is key to achieving a delicious cup of coffee. Store your coffee beans in an airtight container in a cool, dark place to preserve their freshness and flavor. Avoid storing them in the refrigerator or freezer, as moisture can deteriorate the quality of the beans.

Coffee beans are best when used within two weeks of roasting, so try to buy smaller quantities frequently to ensure that you’re brewing with the freshest beans possible. Your taste buds will thank you for it!

Cleaning Your Brewing Equipment

With coffee brewing, cleanliness is vital to maintaining the quality and flavor of your coffee. Regularly clean your brewing equipment, including the coffee maker, grinder, and filters, to prevent any buildup of oils or residue that can affect the taste of your coffee.

Freshness is key when it comes to brewing the perfect cup of coffee. By following these tips and tricks, you’ll be well on your way to brewing a delicious and satisfying cup every time.

Final Words

On the whole, crafting the perfect cup of coffee is a delightful art that can be mastered with practice and attention to detail. From selecting the right beans to perfecting the brewing technique, each step plays a crucial role in achieving that heavenly caffeine fix. If you’re looking to elevate your coffee game, why not check out this insightful article on How to make the perfect cup of coffee at home for more tips and tricks. May your cups always be full and your brews always be bold!

FAQ

Q: What equipment do I need to brew the perfect cup of coffee?

A: To brew the perfect cup of coffee, you will need a high-quality coffee grinder, a scale, a gooseneck kettle, a coffee dripper or French press, and freshly roasted coffee beans.

Q: How do I choose the right coffee beans for brewing the perfect cup of coffee?

A: When opting for coffee beans, opt for freshly roasted beans that suit your taste preference – whether you prefer light, medium, or dark roast. Ensure the beans are within two weeks of their roast date for optimal freshness.

Q: What is the ideal water temperature for brewing the perfect cup of coffee?

A: The ideal water temperature for brewing coffee is between 195-205 degrees Fahrenheit (90-96 degrees Celsius). Boil the water and let it sit for 30 seconds before pouring it over the coffee grounds.

Q: How should I grind my coffee beans for the perfect cup of coffee?

A: The grind size of your coffee beans will depend on the brewing method. For pour-over methods like Chemex or V60, use a medium-fine grind. For French press, use a coarse grind. Experiment with different grind sizes to find the perfect balance.

Q: How long should I brew my coffee for the perfect cup?

A: The ideal brewing time can vary based on your preference and the brewing method. As a general guideline, aim for around 3-4 minutes for most pour-over methods and 4 minutes for French press. Adjust the time to taste, and remember that practice makes perfect.

What are the origins of coffee

How much caffeine is in a cup of coffee

Is coffee good for health

Is coffee good for diabetes

Unlocking the Mystique – Exploring the Rich Flavor Profile of Black Coffee

How do you make a mocha

There’s nothing quite like cozying up with a delicious homemade mocha on a chilly day. Today, we’ll probe the wonderful world of mochas and learn how to make this comforting treat right in your own kitchen. Trust me, with a few simple steps and the right ingredients, you’ll be sipping on a perfectly crafted mocha in no time!

Key Takeaways:

  • Start with high-quality ingredients: Use good quality chocolate, freshly brewed espresso, and high-quality milk for a rich and delicious mocha.
  • Combine espresso and chocolate: Mix the freshly brewed espresso with melted chocolate to create a decadent base for your mocha.
  • Steam the milk for a creamy finish: Froth and steam the milk to a velvety consistency and pour it over the espresso-chocolate mixture to complete your perfect mocha.

Gathering Ingredients

While making a delicious mocha may seem like a complex task, it all starts with gathering the right ingredients. Each component plays a crucial role in creating the perfect balance of coffee and chocolate flavors.

Essential Coffee Beans

Beans are the heart and soul of any good cup of coffee, and the same holds true for a mocha. Opt for high-quality espresso beans or a dark roast to ensure a rich and flavorful base for your mocha.

Rich Chocolate Syrup

Beans To achieve that decadent chocolate flavor in your mocha, you’ll need a rich chocolate syrup. Whether store-bought or homemade, a good quality chocolate syrup will elevate your mocha to the next level.

Plus, adding a touch of sweetness to your mocha. Look for a syrup that is not overly sweet to strike the perfect balance with the bitterness of the espresso.

Velvety Steamed Milk

One crucial component of a mocha is velvety steamed milk. This adds a luxurious creaminess that complements the robust coffee and sweet chocolate flavors perfectly.

Another important step is to froth the milk to achieve that perfect velvety texture, adding a layer of indulgence to your homemade mocha.

Preparing the Coffee Base

Now, let’s probe the crucial steps to prepare the perfect coffee base for your mocha. This foundation sets the tone for the entire drink, so it’s crucial to get it just right.

Grinding the Beans

Grinding the beans fresh is key to a flavorful coffee base. Whether you prefer a coarser grind for a French press or a finer grind for an espresso machine, the goal is to achieve a consistent texture that allows for optimal extraction of flavors during the brewing process.

Brewing the Perfect Shot

Beans that are freshly ground can make a world of difference in the taste of your mocha. Brewing a perfect shot of espresso involves using the right amount of coffee, tamping it down evenly, and allowing hot water to pass through under high pressure. This process extracts the rich and robust flavors of the coffee, creating a strong base for your mocha.

For instance, a double shot of espresso is commonly used in mochas to provide a bold coffee flavor that can stand up to the sweetness of chocolate and milk.

Tips for Achieving the Ideal Crema

To achieve the ideal crema for your mocha, follow these tips:

  • Use freshly roasted coffee beans
  • Ensure your espresso machine is properly heated
  • Grind the beans just before brewing

Any of these factors can impact the quality of the crema, so pay attention to these details to elevate your coffee base.

Melting the Chocolate

To make a delicious mocha, one of the crucial steps is melting the chocolate. This process not only adds richness and depth to your drink but also creates a velvety texture that enhances the overall experience. If you’re following a recipe for a mocha, like this Mocha recipe, melting the chocolate perfectly is key to achieving that decadent flavor profile.

Choosing the Right Chocolate

One crucial aspect of melting chocolate for your mocha is selecting the right type. Opt for high-quality chocolate with at least 70% cocoa content for a rich and intense chocolate flavor. Whether you prefer dark chocolate, milk chocolate, or even white chocolate in your mocha, choose a brand that you enjoy eating on its own. The better the chocolate, the more decadent your mocha will be.

Heating the Syrup to Perfection

An crucial step in melting the chocolate for your mocha is heating the syrup to perfection. This process involves gently warming a mixture of milk and sugar until the sugar dissolves completely. By heating the syrup just below boiling point and stirring constantly, you create a smooth base that blends seamlessly with the melted chocolate, resulting in a velvety and luscious mocha.

Avoiding Burnt or Seized Chocolate

With melting chocolate, there’s always a risk of burning or seizing if not done correctly. To avoid this, use a double boiler or a microwave in short intervals to melt the chocolate slowly and evenly. Make sure to stir frequently and remove the chocolate from the heat as soon as it’s fully melted. Control the temperature carefully to prevent any unwanted texture changes in your mocha.

For instance, if your chocolate starts to seize, add a small amount of hot cream or butter and whisk vigorously to bring it back to a smooth consistency. With a little patience and attention to detail, you can master the art of melting chocolate for your mocha and elevate your coffee experience to new heights.

Steaming the Milk

Purifying the Steam Wand

With any coffee-making process, cleanliness is key! Before steaming the milk for your delightful mocha, ensure that the steam wand is clean and free of any milk residue from previous use. To purify the steam wand, simply purge it with a burst of steam for a few seconds to clear out any lingering milk particles. This step will guarantee a fresh and uncontaminated froth for your mocha.

Frothing the Milk to Desired Texture

Any aspiring barista knows that achieving the perfect froth is necessary for a fabulous mocha. When frothing the milk, it’s crucial to monitor the texture carefully. The goal is to create a velvety microfoam that is silky to the touch and resembles wet paint. This ideal texture will ensure a luscious and decadent mocha with every sip.

Milk frothing can be a bit of an art form, so don’t be discouraged if it takes a few tries to get it just right. Practice makes perfect, and soon you’ll be frothing milk like a pro!

Holding the Pitcher at the Right Angle

Right before you start frothing the milk, make sure to hold the pitcher at the right angle. Position the steam wand slightly off-center in the milk, with the tip just below the surface. Tilt the pitcher slightly to create a whirlpool effect, which helps incorporate air evenly throughout the milk as it froths. This technique will result in a smooth and creamy consistency for your mocha.

Frothing milk at the correct angle is crucial for obtaining the desired froth texture. Be mindful of, practice and patience are key elements in mastering this step of the mocha-making process.

Combining the Ingredients

Pouring the Coffee Base

All great mochas start with a base of freshly brewed espresso. Pour a shot or two of this strong, flavorful coffee into your favorite mug to lay the foundation for a deliciously indulgent drink.

Adding the Chocolate Syrup

An necessary step in making a mocha is adding rich, decadent chocolate syrup to the espresso. Drizzle the syrup into the coffee base, stirring gently to ensure that the flavors marry together harmoniously.

Plus, feel free to adjust the amount of chocolate syrup based on your personal preference. If you have a sweet tooth, add a little extra for a more indulgent treat. For a lighter touch, simply add a small amount to complement the coffee’s bitterness.

Topping with Steamed Milk

Syrup

The final touch to a perfect mocha is a generous topping of steamed milk. Heat the milk until it’s velvety and creamy, then pour it over the espresso and chocolate mixture. The smoothness of the steamed milk adds a luxurious texture to the drink, making each sip a comforting experience.

The art of steaming milk lies in creating a microfoam that adds a frothy richness to your mocha. Take care not to overheat the milk, as it can alter the flavor and texture of the drink. Aim for a silky smooth consistency that enhances the overall mouthfeel of your homemade mocha.

Customizing Your Mocha

Many coffee enthusiasts love to personalize their mochas to suit their taste preferences. From adding whipped cream to experimenting with spices and flavorings, the options for customizing your mocha are endless.

Adding Whipped Cream or Toppings

Toppings can take your mocha to the next level, adding a touch of decadence to your favorite drink. Whether it’s a dollop of whipped cream, a sprinkle of cocoa powder, or a drizzle of caramel sauce, toppings can enhance the overall flavor and presentation of your mocha.

Experimenting with Spices and Flavorings

Whipped cream is a classic addition to any mocha, providing a creamy and indulgent finish to each sip. You can also try flavored whipped creams like vanilla or peppermint for a unique twist on this beloved topping.

This is also the perfect opportunity to experiment with different spices and flavorings to truly make your mocha one-of-a-kind. Consider adding a dash of cinnamon, nutmeg, or even a hint of cayenne pepper for a surprising flavor profile that will tantalize your taste buds.

Creating a Signature Mocha Recipe

Recipe development is a fun and creative process that allows you to hone in on your personal preferences and create a signature mocha recipe that is uniquely yours. Start by exploring different types of chocolate, varying the espresso to milk ratio, and playing around with different sweeteners to find the perfect balance of flavors for your palate.

Another great way to craft a signature mocha recipe is to incorporate unexpected ingredients like sea salt, lavender, or even a splash of your favorite liqueur for a sophisticated twist. Don’t be afraid to get creative and have fun with the process – after all, the joy of making a mocha is in the journey of discovery!

Summing up

Conclusively, creating a delicious mocha at home is a simple and rewarding process. By following the steps outlined in this guide, inspired by the warm and encouraging tone of Julia Child, you can easily prepare a comforting and indulgent mocha in the comfort of your own kitchen. For a detailed step-by-step guide on how to make a Mocha, visit A Beautiful Mess.

FAQ

Q: What is a mocha?

A: A mocha is a delicious coffee beverage that combines espresso, steamed milk, chocolate, and sometimes whipped cream.

Q: What ingredients do I need to make a mocha?

A: To make a mocha, you will need espresso, milk, chocolate syrup, and optionally whipped cream for garnish.

Q: How do I make espresso for a mocha?

A: To make espresso for a mocha, you will need an espresso machine or a stovetop espresso maker. Follow the instructions for your specific machine to brew a shot of espresso.

Q: How do I steam milk for a mocha?

A: To steam milk for a mocha, heat milk in a saucepan on the stovetop or use a milk steamer until it reaches a creamy, frothy consistency.

Q: How do I assemble a mocha?

A: To assemble a mocha, pour the espresso into a cup, add chocolate syrup, pour in the steamed milk, and top with whipped cream if desired. Stir gently before enjoying your delightful mocha!

How is cold brew coffee made

The Ultimate Guide to Brewing the Perfect Cup of Black Coffee at Home

What is a Chemex, and how is it used

Most coffee enthusiasts have heard of the Chemex, but not everyone knows how to use this elegant brewing device to make a perfect cup of coffee. The Chemex is a pour-over coffee maker that produces a clean and flavorful brew. In this blog post, we will explore what exactly a Chemex is, how it works, and the step-by-step process of using it to make delicious coffee at home.

Key Takeaways:

  • Chemex is a type of pour-over coffee maker: Chemex is a pour-over coffee maker known for its elegant design and ability to produce clean and crisp coffee.
  • It uses a special Chemex Bonded Coffee Filter: The Chemex works by placing a special Chemex Bonded Coffee Filter in the top chamber to hold the coffee grounds while allowing the brewed coffee to pass through.
  • Steps to use a Chemex: To use a Chemex, grind coffee beans to a medium-coarse consistency, place the filter in the Chemex, add the coffee grounds, pour hot water over the grounds in circular motions, and enjoy a delicious cup of coffee.

History of Chemex

Invention and Patent

History of the Chemex dates back to 1941 when German inventor Dr. Peter Schlumbohm created this iconic brewing device. Schlumbohm, a chemist with a passion for creating simple but elegant solutions, designed the Chemex with both form and function in mind. In 1942, he was granted a patent for his innovative pour-over coffee maker, which featured a hourglass shape made from borosilicate glass and a wooden collar tied with a leather cord.

Evolution of Design

Patent documents reveal that Schlumbohm’s original design of the Chemex included a heat-resistant glass handle. However, over the years, the handle was eliminated from the design in favor of the sleek, hourglass shape with a wooden collar that we recognize today. This evolution of the design not only added to the aesthetic appeal of the Chemex but also made it more functional and elegant in its simplicity.

Chemex’s design has stood the test of time, maintaining its iconic status as a classic coffee brewing device that combines artistry with functionality. The Chemex remains a favorite among coffee enthusiasts for its ability to produce a clean, flavorful cup of coffee through its unique brewing process.

What is a Chemex

One Your Chemex Has Some Tricks up Its Sleeve.

Definition and Description

Chemex is a pour-over coffee maker that has become a staple in many coffee lovers’ kitchens. Its elegant hourglass shape and wooden collar make it not only a functional brewing device but also a beautiful piece of design.

Materials and Construction

Chemex is typically made of high-quality, heat-resistant glass that does not absorb any flavors or odors, ensuring that your coffee tastes just the way it should. The wooden collar and leather tie not only add to its aesthetic appeal but also provide a comfortable grip while pouring.

Construction: The unique construction of the Chemex allows for a slow and controlled brewing process, where hot water is poured over coffee grounds in a specially designed filter. The resulting coffee is smooth, clean, and flavorful, showcasing the true essence of the beans used.

How to Use a Chemex

Many coffee enthusiasts love using a Chemex for its ability to brew a clean and flavorful cup of coffee. Using a Chemex may seem intimidating at first, but with a little practice, you can perfect the art of brewing coffee with this elegant brewer.

Step-by-Step Brewing Guide

Step Instructions
1 Grind fresh coffee beans to a medium-coarse consistency.
2 Place a Chemex paper filter in the brewer and rinse it with hot water.
3 Add the ground coffee to the filter and pour hot water over it in a circular motion.
4 Allow the coffee to steep for a few minutes, then remove the filter and serve.

Tips for Optimal Flavor

An vital tip for brewing with a Chemex is to use high-quality, freshly roasted coffee beans for the best flavor. It’s also crucial to pre-wet the coffee grounds before brewing to ensure they are evenly saturated and to release trapped gases for better extraction.

  • Experiment with different coffee-to-water ratios and brewing times to find your perfect cup.

On top of that, using a gooseneck kettle can give you more control over the water flow, which is vital for a consistent and balanced extraction. After mastering the basics, don’t be afraid to get creative with different brewing techniques to enhance the flavors of your coffee.

This classic brewing method may take a few tries to get the hang of, but the results are well worth the effort. Experimenting with grind size, water temperature, and pouring technique can help you unlock a world of flavors in your daily cup of coffee.

Benefits of Using a Chemex

Once again, if you’re wondering why Chemex coffee makers are highly praised in the coffee enthusiast community, a visit to Why are Chemex so praised? : r/Coffee might give you a glimpse. These elegant yet simple brewers offer several advantages that make them stand out in the world of coffee brewing.

Clean and Balanced Flavor

The Chemex is known for producing a clean and balanced flavor profile that highlights the nuances of the coffee beans without any bitterness or sediment. The thick filter paper removes oils and any fine particles, resulting in a crisp and smooth cup of coffee that is highly enjoyable for many enthusiasts.

Easy to Clean and Maintain

Cleanliness and maintenance are crucial in coffee brewing, and the Chemex excels in this aspect. The glass body is easy to clean with soap and water, and the wooden collar and leather tie can be removed for washing. Additionally, the Chemex filters are disposable, making cleanup a breeze after brewing a delicious pot of coffee.

Maintain

The Chemex is not only easy to clean but also simple to maintain. With proper care, such as regular cleaning and replacing worn-out parts, a Chemex can last for years, making it a durable and sustainable brewing option for coffee lovers.

Versatility in Brewing Methods

For coffee aficionados who appreciate variety in their brewing methods, the Chemex offers versatility. Whether you prefer hot pour-over coffee, iced coffee, or even experimenting with cold brew techniques, the Chemex can adapt to different styles of coffee preparation, giving you the freedom to explore and enjoy various brewing methods.

Methods

Its unique design and functionality allow users to control brewing variables such as water temperature, grind size, and pour rate, making it a versatile brewing tool for those who want to tailor their coffee-making process to suit their preferences.

Comparison to Other Brewing Methods

For Brew Guide: Chemex | How to Use the …, let’s compare the Chemex to other popular brewing methods to understand its uniqueness and advantages.

Drip Brewing

The Drip Brewing method, popular in devices like the traditional coffee maker, drips hot water over coffee grounds held in a filter. This process extracts the coffee slowly, resulting in a smooth and consistent flavor. The Chemex takes a similar approach but offers a more hands-on experience and the ability to control variables like water temperature and pouring technique to achieve a customized brew.

French Press

French Press brewing involves steeping coffee grounds in hot water and then pressing them down with a plunger. This method produces a rich and full-bodied coffee with a robust flavor profile. While the French Press offers a bold cup, the Chemex delivers a cleaner and more nuanced taste by using a paper filter to remove oils and sediment, resulting in a lighter mouthfeel.

A French Press creates a full-bodied coffee with a thick texture due to fine particles escaping through the mesh filter. This can sometimes leave a slight bitterness in the brew, unlike the cleaner profile achieved with a Chemex.

Pour-over

Methods such as the Hario V60 and Kalita Wave fall under the Pour-over category, where hot water is poured over coffee grounds in a filter. The main difference between the Chemex and these pour-over devices lies in the Chemex’s thicker filter and unique hourglass shape, allowing for a slower brew time and enhanced extraction of flavors.

The Chemex’s design, including the bonded filters and thick paper material, gives the brewer greater control over the extraction process, resulting in a well-balanced and flavorful cup of coffee.

Other

Common Misconceptions about Chemex

Is it Difficult to Use?

Not at all. One common misconception about the Chemex is that it is difficult to use. In reality, it is quite simple and straightforward. All you need to do is place a filter in the Chemex, add your ground coffee, pour hot water over it in a slow and steady manner, and let it drip through. The whole process is not only user-friendly but also allows you to have full control over the brewing variables to create a delicious cup of coffee.

Is it Only for Coffee Snobs?

Only those who have not tried using a Chemex would claim that it is only for coffee snobs. The truth is that anyone can use a Chemex to brew their coffee, regardless of their level of expertise or snobbery. The simplicity of the Chemex design and the quality of coffee it produces make it a versatile brewing method suitable for coffee enthusiasts of all kinds.

To think that the Chemex is only for coffee snobs is to underestimate its accessibility and versatility. Whether you are a coffee aficionado or just someone who enjoys a good cup of joe, the Chemex can cater to your brewing needs without any pretentiousness.

Final Words

The Chemex is a simple yet effective brewing device that produces a clean and flavorful cup of coffee. Its elegant design and use of paper filters result in a smooth and rich coffee without any sediment. By following the proper brewing method, one can easily create a great cup of coffee using a Chemex.

The Chemex’s unique hourglass shape, wooden collar, and leather tie make it a stylish addition to any coffee lover’s collection. Its ease of use and ability to brew multiple cups at once make it a versatile and convenient brewing device. So next time you’re looking to elevate your coffee brewing experience, give the Chemex a try and enjoy a delicious cup of coffee.

FAQ

Q: What is a Chemex?

A: A Chemex is a glass coffee maker that is known for its elegant design and ability to produce a clean and flavorful cup of coffee.

Q: How is a Chemex different from other coffee makers?

A: Unlike other coffee makers, a Chemex uses a paper filter that is thicker than most, which results in a smooth and sediment-free coffee.

Q: What are the key components of a Chemex?

A: The key components of a Chemex include the glass carafe, the Chemex bonded filters, and the wooden collar and tie, which serve as a handle.

Q: How is a Chemex used to make coffee?

A: To use a Chemex, you first place a Chemex bonded filter in the top of the carafe, add your coffee grounds, pour hot water over the grounds in a circular motion, and let it drip through the filter.

Q: What are some tips for using a Chemex?

A: Some tips for using a Chemex include rinsing the filter before adding the coffee grounds, using a gooseneck kettle for better control over pouring, and experimenting with the coffee-to-water ratio to find your preferred strength.

What are the best coffee regions in the world

How does coffee affect sleep

How is cold brew coffee made

What are the origins of coffee

How much caffeine is in a cup of coffee

What is a coffee puck

Grounds from a freshly brewed espresso shot are compressed into a dense disc known as a coffee puck. This compacted puck is the remnant of the brewing process, containing spent coffee grounds that have been extracted of their flavor and aroma. Understanding the significance of the coffee puck is necessary for coffee enthusiasts looking to perfect their brewing techniques and extract the finest flavors from their beans.

Key Takeaways:

  • Coffee puck: A coffee puck refers to the compacted disc of used coffee grounds remaining in the portafilter after an espresso shot is extracted.
  • Purpose: The puck acts as a barrier between the extracted espresso and the brewing equipment, ensuring a clean extraction process for subsequent shots.
  • Disposal: Proper disposal of the coffee puck is crucial to prevent clogging and maintain the cleanliness of the espresso machine.
  • Reuse: Coffee pucks can be repurposed as compost or used in gardening as a natural fertilizer due to their rich nutrient content.
  • Indication of quality: The texture and consistency of the coffee puck can indicate the quality of the espresso extraction process and the freshness of the coffee grounds used.

Definition

Origins of the Term

To understand what a coffee puck is, we must examine into its origins. The term “coffee puck” comes from the shape and form left behind after brewing a cup of espresso. This dense, compacted disc of used coffee grounds is often referred to as a puck due to its resemblance to a hockey puck.

Coffee Industry Jargon

On the coffee scene, the term “coffee puck” is part of the industry jargon used by baristas and coffee enthusiasts. It is a familiar sight in cafes and households where espresso machines are a staple. The ritual of creating and discarding a coffee puck is a fundamental part of the espresso-making process.

The creation and disposal of a coffee puck is a ritualistic act that signifies the completion of making a perfect shot of espresso. It is a tangible representation of the care and precision that goes into crafting a quality coffee beverage.

Composition

Coffee Grounds

One crucial component of a coffee puck is the coffee grounds. These are the remnants of the coffee beans after they have been through the grinding process. The size of the coffee grounds plays a crucial role in the extraction process, affecting the flavor and strength of the espresso shot.

Tamping and Compression

An integral part of creating a coffee puck is tamping and compressing the coffee grounds into a puck-like shape inside the portafilter. Tamping involves using a tamper to evenly press down on the coffee grounds to create a uniform surface for water to flow through during the brewing process. Proper tamping ensures that the water passes through the coffee grounds evenly, extracting the flavors effectively.

Plus, compression is crucial to ensure that the coffee grounds stay compacted together to create resistance for the water flow. This process is crucial in controlling the extraction time and ultimately the taste of the final espresso shot.

Purpose

Your Espresso Pucks: What Matters & What Doesn’t article examines into the purpose of a coffee puck in espresso making. Let’s explore two key aspects:

Even Extraction

Even extraction is crucial in espresso brewing as it ensures that the flavors are evenly extracted from the coffee grounds, resulting in a balanced and flavorful shot. When the coffee puck is properly prepared and tamped, it promotes consistent water flow through the grounds, leading to a more uniform extraction. This yields a well-rounded espresso with a harmonious blend of flavors, highlighting the coffee’s nuances.

Preventing Channeling

One critical purpose of the coffee puck is to prevent channeling during the espresso extraction process. Channeling occurs when water finds the path of least resistance through the puck, leading to uneven extraction and a less flavorful shot. By creating a compact and evenly distributed coffee puck, baristas can minimize the risk of channeling and ensure that the water flows through the grounds uniformly, extracting the full flavor profile of the coffee.

Plus, maintaining a consistent puck density and ensuring there are no weak spots can further help prevent channeling, resulting in a more balanced and flavorful espresso shot.

Types

After understanding what a coffee puck is, it’s vital to research into the different types available. There are a few distinct categories of coffee pucks, each catering to specific brewing methods and preferences. Here’s a breakdown of the various types:

Standard Pucks Specialty Pucks (e.g., espresso, Turkish coffee)
An ideal choice for traditional espresso machines Turkish coffee pucks are specifically designed for the unique brewing process
Commonly used in cafes and households Espresso pucks are compact and finely ground, optimizing the extraction process
Available in various sizes to fit different portafilter baskets Ensure a rich and robust flavor profile in every cup
Suitable for quick and convenient espresso preparation Enhance the traditional Turkish coffee experience with authentic pucks
Can be disposed of easily after use Provide a cultural touch to your coffee brewing routine

Standard Pucks

Standard pucks are the go-to option for many espresso enthusiasts using traditional espresso machines. These pucks are designed to fit standard portafilter baskets and are a convenient choice for daily espresso brewing. Easily disposable, these pucks offer a hassle-free cleanup process, making them a popular choice for cafes and home baristas.

Thou can find standard pucks in various sizes to accommodate different espresso machine models, ensuring a snug fit in the portafilter basket for optimal extraction during the brewing process.

Specialty Pucks (e.g., espresso, Turkish coffee)

Turkish coffee pucks are specially crafted for the unique brewing method of Turkish coffee, a traditional and flavorful way of preparing coffee. These pucks are finely ground and meticulously designed to enhance the rich and aromatic experience that Turkish coffee is known for. Using authentic Turkish coffee pucks can elevate your coffee ritual and provide a cultural touch to your daily routine.

To further enhance your coffee experience, espresso pucks are tailored to meet the specific requirements of espresso brewing, ensuring a balanced and intense shot every time. Specialty pucks like these cater to different brewing methods and preferences, allowing coffee enthusiasts to explore diverse flavors and brewing techniques with ease.

Benefits

Despite being a seemingly simple byproduct of the espresso-making process, the coffee puck offers a range of benefits that contribute to a superior coffee experience.

Consistent Flavor

Flavor is a crucial aspect of any coffee brewing method, and the use of coffee pucks can help ensure a consistent and delicious taste every time. By properly compacting the coffee grounds into a puck, the water is forced to pass through the grounds evenly, extracting optimal flavor and aroma from the beans. This results in a well-balanced and rich espresso shot that is sure to satisfy your taste buds.

Efficient Brewing

For those who value efficiency in their coffee preparation, coffee pucks offer a convenient and time-saving solution. By quickly and easily removing the used puck from the portafilter, you can swiftly prepare your espresso machine for the next shot, streamlining the brewing process and saving precious minutes during your morning routine.

For instance, in a busy coffee shop where speed and consistency are key, the use of coffee pucks can significantly increase the workflow and ensure that customers receive their coffee promptly without compromising on quality.

Maintenance

Cleaning and Storage

Now, to ensure your espresso machine continues to produce the perfect coffee puck, it’s crucial to clean it regularly. After brewing, remove the coffee puck from the portafilter and rinse it under water to prevent residue buildup. Additionally, wipe down the portafilter and machine to keep them free from coffee grounds. Once cleaned, store the portafilter in a dry place to prevent the growth of mold or mildew.

Preventing Clogging

To prevent clogging in your espresso machine, it’s vital to use the right grind size and tamping pressure when making your coffee puck. Make sure the coffee grounds are evenly distributed in the portafilter before tamping. Avoid compacting the grounds too densely, as this can lead to clogging in the machine.

With proper maintenance and care, you can ensure that your espresso machine consistently produces high-quality coffee pucks, resulting in delicious and aromatic espresso shots every time you brew.

To wrap up

The article “What is a Coffee Puck” has shed light on the significance of coffee pucks in the world of espresso. These compact discs of used coffee grounds play a crucial role in the brewing process, ensuring the extraction of flavors and aromas in each shot of espresso. Understanding the importance of a well-prepared coffee puck is imperative for anyone looking to enjoy a high-quality coffee experience.

The coffee puck may seem like a simple byproduct of brewing espresso, but its role in creating the perfect shot cannot be understated. As coffee enthusiasts continue to explore the world of specialty coffee, the knowledge of how to create and handle a coffee puck will undoubtedly enhance their appreciation for the art and science of espresso brewing.

FAQ

Q: What is a coffee puck?

A: A coffee puck is the compacted disc of used coffee grounds left behind after making espresso with a portafilter.

Q: How is a coffee puck formed?

A: A coffee puck is formed by filling a portafilter with coffee grounds, tamping them down firmly, and then passing hot water through the grounds to extract espresso.

Q: Why is it called a coffee puck?

A: It is called a coffee puck because of its puck-like shape and the resemblance it bears to a hockey puck.

Q: What can you do with a coffee puck?

A: Coffee pucks can be composted, used as a natural fertilizer for plants, or even repurposed in DIY beauty treatments like scrubs or masks.

Q: How should a coffee puck be disposed of?

A: Coffee pucks should be allowed to dry out before disposing of them in the compost or trash to prevent mold growth.

Q: Can coffee pucks be reused?

A: While coffee pucks are typically used grounds that have already been extracted, some people use them to make a second, albeit weaker, cup of coffee.

Q: Are there any creative ways to reuse coffee pucks?

A: Yes, coffee pucks can be used in DIY projects such as making candles, deodorizers, or as a natural exfoliant in skincare routines.

How is cold brew coffee made

What is a coffee crema

There’s a unique component of your espresso that holds the key to its richness and flavor – the elusive coffee crema. This velvety layer of golden-brown froth crowning your shot isn’t just for aesthetics; it’s a telltale sign of a well-prepared espresso. Let’s probe into the world of coffee crema, unraveling its significance, how it forms, and why it’s prized by coffee aficionados worldwide.

Key Takeaways:

  • Coffee Crema: It is the golden-brown foam that sits on top of an espresso shot, crafted during the brewing process.
  • Sign of Quality: A rich crema indicates the freshness of the coffee beans and the effectiveness of the espresso machine.
  • Texture and Flavor: The crema adds a velvety texture to the espresso and enhances the overall taste by balancing bitterness with a hint of sweetness.
  • Crema Maintenance: Factors like bean quality, grind size, and machine pressure influence the crema’s thickness and longevity.
  • Enjoyment: Sipping an espresso with a thick crema is a delight for coffee enthusiasts, offering a visual appeal and a burst of flavors with each sip.

Defining Coffee Crema

While enjoying your favorite espresso shot or cappuccino, you may have noticed a delightful layer of foam-like substance resting on top of your coffee – that’s the coffee crema. This golden-brown froth not only adds aesthetic appeal to your beverage but also contributes significantly to its flavor and aroma.

The Science Behind Crema Formation

On a chemical level, coffee crema is primarily composed of emulsified oils and carbon dioxide gas, a byproduct of the coffee bean roasting process. When high-pressure hot water passes through finely ground coffee in an espresso machine, these elements are forced to the surface, creating the distinctive crema layer.

The Role of Espresso Machines

The espresso machine plays a vital role in the formation of coffee crema. By subjecting the coffee grounds to 9 bars of pressure (or higher), espresso machines facilitate the emulsification of oils and extraction of carbon dioxide, resulting in the creamy layer we all love.

For instance, the type of espresso machine, the grind size of the coffee, and the brewing temperature all play a part in determining the quality and thickness of the crema atop your espresso. A well-maintained and correctly operated espresso machine is vital for achieving that perfect crema with every brew.

Characteristics of Coffee Crema

There’s an art to understanding the characteristics of coffee crema, the golden-brown layer that crowns a well-prepared espresso shot. This velvety foam is a symbol of quality and plays a vital role in the overall coffee-drinking experience.

Texture and Mouthfeel

Crema should be thick and velvety, with tiny bubbles dispersed evenly throughout the surface. When properly extracted, it should have a creamy texture that complements the intensity of the espresso beneath it. The mouthfeel of crema is rich and luxurious, adding a smooth layer to each sip of coffee.

Flavor Profile and Aroma

Crema contributes significantly to the flavor profile and aroma of the espresso. It should have a slightly sweet taste with hints of bitterness, creating a balanced and complex flavor profile. Additionally, the aroma of the crema should be inviting, with notes of roasted coffee beans and a subtle hint of caramel.

Plus, the crema also serves as a natural insulator, helping to retain the heat of the espresso below and preserving its flavors until the last sip.

In your forthcoming blog post, the chapter “Types of Coffee Crema” will be an necessary part of educating your readers about the diverse characteristics of this coffee element. Let’s explore the different types of coffee crema with a structured approach.
Thick and Velvety Crema

To understand the different types of coffee crema, it is crucial to distinguish the thick and velvety crema. This type of crema is dense and rich in texture, often signaling a well-extracted espresso shot. Its luxurious appearance adds a layer of complexity to the coffee, enhancing both the visual appeal and the overall flavor profile.

Thin and Watery Crema

With thin and watery crema, the visual presentation of the coffee changes significantly. This type of crema appears less substantial and lacks the characteristic richness of thicker crema varieties. It may indicate a less than ideal extraction process or aging coffee beans.

Watery crema can result from various factors, such as using old coffee beans, improper tamping techniques, or inconsistencies in the espresso machine’s pressure. When encountering thin and watery crema, it is necessary to evaluate the coffee-making process to ensure a more favorable outcome in future brews.

  • Thick and Velvety Crema
  • Thin and Watery Crema
  • Balanced Crema
  • Layered Crema
  • Speckled Crema

This structured breakdown of the types of coffee crema will provide your readers with a comprehensive understanding of the various textures and appearances they may encounter in their coffee experiences. Keeping Hemingway’s concise style in mind, this organized approach will help convey complex information in a clear and engaging manner.

Factors Affecting Coffee Crema

Keep in mind that several factors can influence the quality and quantity of the crema on your coffee. Here are some crucial factors to consider:

  • Coffee Bean Quality and Roast Level
  • Espresso Machine Maintenance and Cleaning
  • Barista Skills and Technique

Any of these factors can impact the crema’s thickness, color, and overall quality. For more insights into the world of coffee, you may want to explore What is the difference between Americano and Café Crème?

Coffee Bean Quality and Roast Level

Coffee bean quality and roast level play a significant role in the crema’s formation. Freshly roasted beans with a medium to dark roast profile tend to produce a rich and creamy crema. The beans’ freshness and the level of oils present in the beans can also affect the crema’s texture and thickness.

Espresso Machine Maintenance and Cleaning

Quality espresso machine maintenance and cleaning are necessary for a perfect crema. A clean machine free from any coffee residues or mineral deposits ensures proper pressure and water flow, leading to a thicker and more consistent crema. Regular descaling and backflushing are crucial to keep your espresso machine in top shape.

Roast your day with a frothy crema by taking good care of your espresso machine.

Barista Skills and Technique

On top of using quality beans and maintaining your espresso machine, barista skills and technique also influence the crema’s quality. The way the coffee is tamped, the water temperature, and the extraction time all play a crucial role in creating a perfect crema. Baristas with proper training and experience can manipulate these variables to achieve the desired crema consistency and flavor profile.

The art of crafting a perfect crema lies in the hands of a skilled barista.

The Importance of Coffee Crema

Once again, we investigate into the world of coffee crema to explore its significance in coffee connoisseurs. The crema, a golden-brown layer that sits atop your espresso, is more than just a visually appealing component – it plays a crucial role in enhancing your overall coffee experience.

Enhancing Flavor Experience

Enhancing the flavor experience, coffee crema provides a velvety texture that complements the rich, bold flavors of the espresso. Its presence indicates a well-extracted shot, where the oils from the coffee beans are emulsified to create a complex and aromatic taste profile. When sipping a crema-topped espresso, you can expect a harmonious balance of bitterness, sweetness, and acidity that lingers on your palate.

Visual Appeal and Presentation

To coffee aficionados and baristas alike, the visual appeal and presentation of a well-crafted crema are equally as important as its taste. The crema adds a layer of sophistication to your coffee cup, signaling quality and freshness. Its distinct hue and creamy texture serve as a visual cue for the richness and intensity of the espresso beneath it.

The coffee crema not only enhances the flavor profile of your espresso but also elevates the overall sensory experience of enjoying a cup of coffee. Its presence can indicate the quality of the beans, the skill of the barista, and the freshness of the brew. Next time you take a sip of your favorite espresso, take a moment to appreciate the golden layer of crema that tops it off.

Common Misconceptions About Coffee Crema

Debunking the Myth of Over-Extraction

Now, one common misconception about coffee crema is that its presence indicates over-extraction. This belief stems from the idea that the crema is a result of excessive pressure during the brewing process. However, crema is actually a natural byproduct of brewing espresso and is not necessarily linked to over-extraction.

Separating Fact from Fiction

For many coffee enthusiasts, there is a misconception that the crema is the primary indicator of the quality of an espresso shot. While crema can certainly enhance the visual appeal of a shot and contribute to its overall flavor profile, it is not the sole factor to consider. The taste, aroma, and mouthfeel of the espresso are equally important in determining its quality.

Myth from the reality, it is imperative to understand that while crema is a desirable component of a well-made espresso, its presence alone does not guarantee a perfect shot. The crema should complement the overall sensory experience of the coffee, adding a layer of texture and flavor without overshadowing the taste of the espresso itself.

Conclusively

Understanding the essence of a coffee crema is delving into the intricate world of coffee craftsmanship. This thin layer of golden goodness atop a freshly brewed espresso is a visual and sensory delight, showcasing the quality of the beans used and the barista’s skill. It not only adds a luxurious touch to a cup of coffee but also enhances the flavor and overall experience. So next time you take a sip of your favorite espresso, take a moment to appreciate the beauty and complexity of the crema that graces its surface.

FAQ

Q: What is a coffee crema?

A: Coffee crema is the golden-brown layer of foam that forms on the top of a freshly brewed espresso shot. It is a sign of a well-extracted espresso and adds to the overall flavor and aroma of the coffee.

Q: How is coffee crema formed?

A: Coffee crema is formed when hot water is forced through finely ground coffee beans under high pressure. The emulsification of oils in the coffee during the brewing process creates the creamy layer on top.

Q: What does coffee crema taste like?

A: Coffee crema has a rich and creamy texture with a slightly sweet taste. It enhances the overall coffee experience by providing a smooth and velvety mouthfeel.

Q: Does coffee crema affect the flavor of the coffee?

A: Yes, coffee crema plays a significant role in the flavor profile of espresso. It helps trap the aroma and volatile compounds in the coffee, resulting in a more flavorful and aromatic cup of coffee.

Q: Why is coffee crema important?

A: Coffee crema is important as it indicates the freshness of the coffee beans, the quality of the grind, and the proper extraction of the espresso shot. It also adds visual appeal to the coffee and enhances the overall drinking experience.

Q: How long does coffee crema last?

A: Coffee crema is a transient layer that begins to dissipate as soon as the espresso shot is brewed. It typically lasts for a few minutes before blending into the rest of the coffee.

Q: Can you make coffee crema at home?

A: Yes, you can create coffee crema at home by using a high-quality espresso machine that can generate the necessary pressure to emulsify the coffee oils and create the creamy layer on top of your espresso shot.

How is cold brew coffee made

How is cold brew coffee made

Most coffee enthusiasts are familiar with the smooth and rich taste of cold brew coffee, but have you ever wondered how this delicious beverage is actually made? In this informative post, we will explore the simple yet precise steps involved in creating the perfect cold brew coffee right in the comfort of your own home. From selecting the right beans to the brewing process, get ready to learn all about how to make your own batch of cold brew coffee.

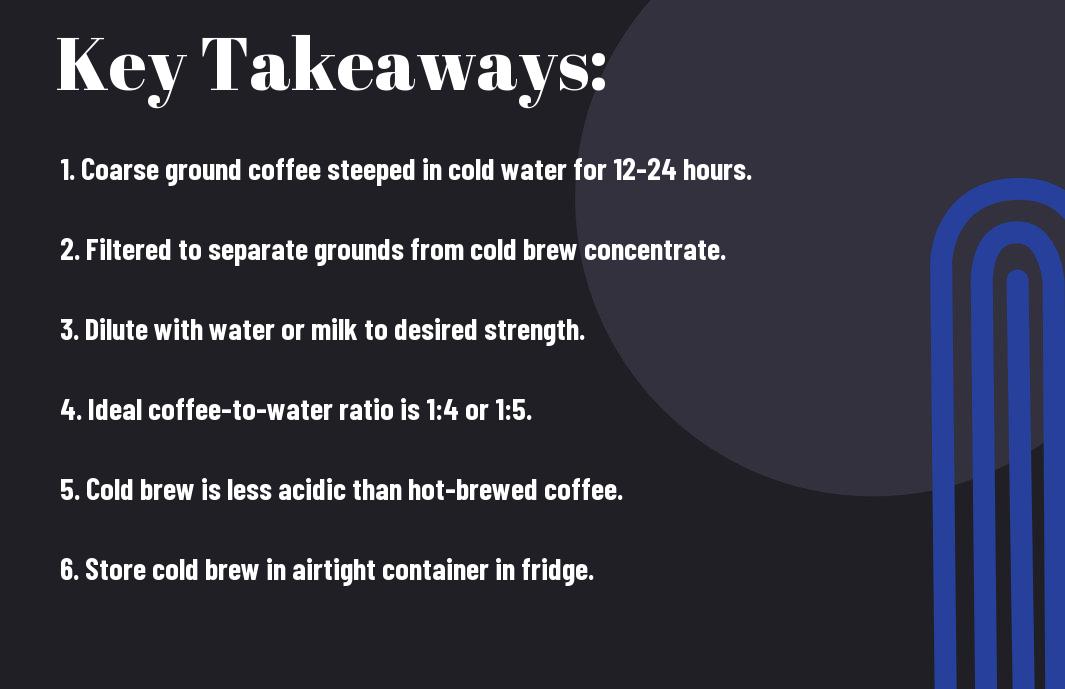
Key Takeaways:

  • Cold Brew Coffee Process: Cold brew coffee is made by steeping coarsely ground coffee beans in cold water for an extended period, usually 12-24 hours.
  • No Heat Required: Unlike traditional hot coffee brewing methods, cold brew coffee is made with no heat involved, resulting in a smoother and less acidic flavor profile.
  • Effortless Brewing: Making cold brew coffee at home is simple and requires minimal equipment, such as a jar or pitcher, a fine-mesh strainer, or a coffee filter.
  • Cold Brew Concentrate: The concentrated cold brew can be diluted with water, milk, or a milk alternative, depending on personal taste preferences and desired strength.
  • Subscription Services: For those who prefer convenience, there are cold brew coffee subscription services that deliver ready-to-drink bottles or concentrate straight to your doorstep.

The Basics of Cold Brew Coffee

Before delving into the specifics of how cold brew coffee is made, it’s important to understand the basics of this popular beverage. Cold brew coffee is a method of brewing coffee that uses cold water to extract the flavors from the coffee beans over an extended period of time. The result is a smooth, rich, and slightly sweet coffee concentrate that can be enjoyed cold or hot.

What is Cold Brew Coffee?

What sets cold brew coffee apart from traditional coffee brewing methods is its lack of heat in the extraction process. Rather than using hot water to quickly extract the flavors from the coffee grounds, cold brew involves steeping coarsely ground coffee beans in cold water for 12-24 hours. This slow extraction process produces a coffee concentrate that is less acidic and bitter than hot-brewed coffee, making it a favorite among coffee lovers with sensitive stomachs or a preference for a smoother taste.

Brief History of Cold Brew Coffee

On a historical note, the practice of cold brewing coffee can be traced back centuries, with origins in Japan and the Middle East. The traditional Japanese method of cold brew, known as “Kyoto-style” coffee, involves slowly dripping cold water over coffee grounds in a glass tower. This method results in a delicately flavored and aromatic coffee that is prized for its gentle extraction process.

Plus, in recent years, cold brew coffee has surged in popularity in the United States and around the world, becoming a staple in many coffee shops and homes. Its smooth and mellow flavor profile, along with its higher caffeine content per serving, has contributed to its widespread appeal among coffee enthusiasts.

Ingredients and Equipment

Coffee Beans: Choosing the Right Type

On the quest to make the perfect cold brew coffee, the choice of coffee beans is crucial. Look for freshly roasted, coarse-ground coffee beans. The grind size impacts the flavor extraction during the steeping process. Specialty coffee beans with flavor notes that you enjoy in hot coffee—such as fruity, nutty, or chocolatey undertones—will shine in cold brew as well. For a detailed cold brew recipe, check out the Cold Brew Coffee Recipe (with Video) – NYT Cooking for guidance.

Grinders: Blade vs. Burr

To achieve the optimal grind consistency for your cold brew coffee, the type of grinder you use matters. Blade grinders can create uneven coffee grounds, leading to an inconsistent brew. On the other hand, burr grinders offer precision and uniformity in grinding, ensuring a consistent extraction of flavors from the coffee beans. Investing in a quality burr grinder can enhance the overall taste and quality of your cold brew coffee.

To make a smooth and rich cold brew coffee, the grind size should be coarse, resembling sea salt. Burr grinders provide more control over the grind size, allowing you to adjust it according to your preference and the brewing method you choose.

Cold Brew Coffee Makers: Options and Reviews

Any coffee lover exploring the world of cold brew should consider investing in a dedicated cold brew coffee maker. These specialized devices streamline the brewing process and often include features like built-in filters and airtight seals to enhance the steeping experience. Popular options include cold brew coffee makers from OXO, Toddy, and Hario, each offering unique features to cater to different preferences and brewing quantities.

Grinders play a crucial role in the cold brew coffee-making process, as they influence the flavor extraction and overall quality of the brew. Whether opting for a blade or burr grinder, maintaining a consistent grind size is key to achieving a balanced and flavorful cold brew coffee.

The Brewing Process

Despite the simplicity of cold brew coffee, the brewing process involves a few key steps to extract the desired flavors and caffeine from the coffee beans.

Measuring and Grinding Coffee

Any successful cold brew starts with the right ratio of coffee grounds to water. Typically, a ratio of 1:4 or 1:5 (coffee to water) is recommended for a concentrated brew that can be later diluted with water or milk. Coarse coffee grounds are vital for cold brew to prevent over-extraction during the steeping process.

Steeping Coffee: Time and Temperature

To steep the coffee grounds properly, it’s vital to allow enough time for the flavors to develop. Cold brew coffee is usually steeped for 12 to 24 hours at room temperature or in the refrigerator. The cold brewing process extracts the coffee’s rich, smooth flavors while reducing the acidity.

Time Temperature
12-24 hours Room temperature or refrigerator

To enhance the extraction process, some coffee enthusiasts recommend stirring the grounds once or twice during the steeping time to ensure even saturation and flavor distribution.

Straining and Filtering: Techniques and Tools

Another crucial step in the cold brew process is straining and filtering the brewed coffee to remove the grounds and sediments. This can be done using various tools such as a fine mesh sieve, cheesecloth, or a specialized cold brew coffee maker with built-in filters.

Techniques Tools
Straining Fine mesh sieve, cheesecloth
Filtering Cold brew coffee maker

Coffee filters or multiple layers of cheesecloth can further refine the brewed coffee, ensuring a clean and smooth final product ready to be enjoyed over ice or mixed with your favorite ingredients for a personalized cold brew creation.

Factors Affecting Flavor

All cold brew coffee lovers know that the flavor of this refreshing beverage can be influenced by several key factors. Here are some important aspects to consider when making your own cold brew coffee at home:

  • Coffee-to-Water Ratio: Finding the Sweet Spot
  • Roast Level: Light, Medium, or Dark?
  • Age of Coffee Beans: Freshness Matters

Coffee-to-Water Ratio: Finding the Sweet Spot

Flavor is greatly impacted by the coffee-to-water ratio used in the cold brew process. While the standard ratio is one pound of coffee to one gallon of water, you can adjust this to suit your taste preferences. Experiment with different ratios to find the perfect intensity and strength for your brew. For a detailed cold brew coffee recipe and more tips, check out Cold Brew Coffee (Recipe & Tips!).

Roast Level: Light, Medium, or Dark?

Light roasts are known for their bright acidity and floral notes, while medium roasts offer a balanced flavor profile with hints of chocolate and fruity undertones. Dark roasts, on the other hand, are rich and bold, with smoky overtones. The roast level you choose will significantly impact the overall taste of your cold brew coffee.

The choice of roast level depends on personal preference and desired flavor profile. Experiment with different roast levels to discover which one best complements the cold brew process and satisfies your taste buds.

Age of Coffee Beans: Freshness Matters

Flavor in cold brew coffee is also affected by the age of the coffee beans used. Freshly roasted beans retain their flavor compounds, resulting in a more vibrant and aromatic brew. As beans age, they lose some of their complexities, leading to a less flavorful cup of cold brew.

To ensure the best taste experience, always use freshly roasted coffee beans when making cold brew. Check the roast date on the packaging and aim to use beans within two to four weeks of roasting for optimal flavor extraction.

Based on the article title “How is cold brew coffee made”, I detect that the article type is an informative/instructional article, likely written in a clear and concise tone reminiscent of Michael Pollan, a famous writer known for his straightforward and engaging writing style on food and drink topics.

Experimenting with Flavors

To truly elevate your cold brew coffee experience, consider experimenting with different flavors and ingredients to create unique and delicious concoctions.

Adding Spices and Herbs: Creative Combinations

One way to enhance the flavor profile of your cold brew is by adding spices and herbs. Try infusing your coffee with cinnamon sticks, whole cloves, or fresh mint leaves for a refreshing twist. You can also get creative and experiment with combinations like cardamom and ginger for a spicy kick or lavender and vanilla for a floral and sweet infusion.

Infusing with Fruits and Nuts: Delicious Twists

Flavors like citrus fruits, berries, and nuts can add a delightful twist to your cold brew coffee. Experiment with slices of oranges or lemons, muddle in some fresh strawberries or raspberries, or try adding a splash of almond or coconut milk for a creamy and nutty flavor profile.

To infuse your cold brew with fruits and nuts, simply add your chosen ingredients to the coffee grounds before brewing to allow the flavors to meld together.

Blending with Other Beverages: Coffee Cocktails

On hot summer days, take your cold brew coffee to the next level by blending it with other beverages to create delicious coffee cocktails. Mix your cold brew with creamy coconut milk and a splash of rum for a tropical treat, or combine it with chocolate syrup and ice for a refreshing mocha frappe.

Other ideas for coffee cocktails include adding a shot of espresso to your cold brew for an extra caffeine kick, or mixing it with flavored syrups and liqueurs for a sweet and indulgent treat.

Common Mistakes and Troubleshooting

Over- or Under-Extraction: Causes and Solutions

Now, one of the common mistakes in making cold brew coffee is over- or under-extraction. Over-extraction can result in a bitter and unpleasant taste, while under-extraction leads to a weak and watery brew. To avoid these issues, be mindful of the brewing time and grind size. If your coffee is too bitter, try reducing the steeping time or using a coarser grind. On the other hand, if your brew tastes weak, increase the steeping time or use a finer grind.

Bitterness and Acidity: Balancing the Flavors

Mistakes in balancing the flavors of cold brew coffee can result in either excessive bitterness or overwhelming acidity. Achieving the right balance is key to a delicious cup of cold brew. To avoid bitterness, ensure you’re using high-quality coffee beans and a proper extraction process. Acidity can be managed by choosing a darker roast or adjusting the steeping time.

Storage and Shelf Life: Tips for Freshness

Troubleshooting storage and shelf life issues can help in maintaining the freshness of your cold brew coffee. It’s necessary to store your cold brew in a sealed container in the refrigerator to prevent oxidation and maintain its flavors. Additionally, consume your cold brew within 2-3 days for the best taste.

  • Store cold brew in a sealed container in the refrigerator.
  • Consume your cold brew within 2-3 days for the best taste.

After addressing these storage and freshness tips, you’ll notice a significant improvement in the quality and taste of your cold brew coffee.

Understanding the Science Behind Cold Brew

Balancing the extraction process and flavors of cold brew coffee requires an understanding of the science behind it. Factors such as grind size, brewing time, and water temperature play a crucial role in the final taste of your cold brew. Experimenting with these variables can help you tailor your brew to suit your taste preferences.

  • Adjust grind size, brewing time, and water temperature to customize your cold brew.
  • After mastering these factors, you’ll be able to consistently create a delicious and refreshing cup of cold brew coffee.

Conclusion

Drawing together all the steps outlined above, it is evident that cold brew coffee is made by steeping coarsely ground coffee beans in cold water for an extended period of time, typically 12-24 hours, to extract the flavors and caffeine. The resulting concentrate can be diluted with water or milk and served over ice for a refreshing and flavorful coffee experience. Understanding the simple yet unique process of making cold brew coffee can provide coffee lovers with an easy and delicious alternative to hot brewed coffee, especially during the hot summer months.

FAQ

Q: What is cold brew coffee?

A: Cold brew coffee is a method of coffee preparation where coffee grounds are steeped in cold water for an extended period of time, resulting in a smooth, rich, and slightly sweet coffee concentrate.

Q: What ingredients are needed to make cold brew coffee?

A: To make cold brew coffee, you will need coarsely ground coffee beans, cold water, a container for steeping, and a fine mesh strainer or cheesecloth for filtering out the grounds.

Q: How is cold brew coffee made?

A: To make cold brew coffee, simply combine coffee grounds and cold water in a container, let it steep for 12-24 hours at room temperature or in the refrigerator, and then strain out the grounds to extract the coffee concentrate.

Q: What is the ratio of coffee grounds to water for making cold brew coffee?

A: A common ratio for making cold brew coffee is 1:4, which means 1 part coffee grounds to 4 parts water. However, you can adjust the ratio to suit your taste preferences.

Q: How should cold brew coffee be served?

A: Cold brew coffee can be served over ice, diluted with water or milk, and sweetened with sugar or flavored syrups. It can also be enjoyed hot by heating the concentrate and mixing it with hot water or milk.

What are the origins of coffee

How much caffeine is in a cup of coffee

Is coffee good for health

Is coffee good for diabetes

Unlocking the Mystique – Exploring the Rich Flavor Profile of Black Coffee