Coffee Brewing Tips

What is a Chemex, and how is it used

Most coffee enthusiasts have heard of the Chemex, but not everyone knows how to use this elegant brewing device to make a perfect cup of coffee. The Chemex is a pour-over coffee maker that produces a clean and flavorful brew. In this blog post, we will explore what exactly a Chemex is, how it works, and the step-by-step process of using it to make delicious coffee at home.

Key Takeaways:

  • Chemex is a type of pour-over coffee maker: Chemex is a pour-over coffee maker known for its elegant design and ability to produce clean and crisp coffee.
  • It uses a special Chemex Bonded Coffee Filter: The Chemex works by placing a special Chemex Bonded Coffee Filter in the top chamber to hold the coffee grounds while allowing the brewed coffee to pass through.
  • Steps to use a Chemex: To use a Chemex, grind coffee beans to a medium-coarse consistency, place the filter in the Chemex, add the coffee grounds, pour hot water over the grounds in circular motions, and enjoy a delicious cup of coffee.

History of Chemex

Invention and Patent

History of the Chemex dates back to 1941 when German inventor Dr. Peter Schlumbohm created this iconic brewing device. Schlumbohm, a chemist with a passion for creating simple but elegant solutions, designed the Chemex with both form and function in mind. In 1942, he was granted a patent for his innovative pour-over coffee maker, which featured a hourglass shape made from borosilicate glass and a wooden collar tied with a leather cord.

Evolution of Design

Patent documents reveal that Schlumbohm’s original design of the Chemex included a heat-resistant glass handle. However, over the years, the handle was eliminated from the design in favor of the sleek, hourglass shape with a wooden collar that we recognize today. This evolution of the design not only added to the aesthetic appeal of the Chemex but also made it more functional and elegant in its simplicity.

Chemex’s design has stood the test of time, maintaining its iconic status as a classic coffee brewing device that combines artistry with functionality. The Chemex remains a favorite among coffee enthusiasts for its ability to produce a clean, flavorful cup of coffee through its unique brewing process.

What is a Chemex

One Your Chemex Has Some Tricks up Its Sleeve.

Definition and Description

Chemex is a pour-over coffee maker that has become a staple in many coffee lovers’ kitchens. Its elegant hourglass shape and wooden collar make it not only a functional brewing device but also a beautiful piece of design.

Materials and Construction

Chemex is typically made of high-quality, heat-resistant glass that does not absorb any flavors or odors, ensuring that your coffee tastes just the way it should. The wooden collar and leather tie not only add to its aesthetic appeal but also provide a comfortable grip while pouring.

Construction: The unique construction of the Chemex allows for a slow and controlled brewing process, where hot water is poured over coffee grounds in a specially designed filter. The resulting coffee is smooth, clean, and flavorful, showcasing the true essence of the beans used.

How to Use a Chemex

Many coffee enthusiasts love using a Chemex for its ability to brew a clean and flavorful cup of coffee. Using a Chemex may seem intimidating at first, but with a little practice, you can perfect the art of brewing coffee with this elegant brewer.

Step-by-Step Brewing Guide

Step Instructions
1 Grind fresh coffee beans to a medium-coarse consistency.
2 Place a Chemex paper filter in the brewer and rinse it with hot water.
3 Add the ground coffee to the filter and pour hot water over it in a circular motion.
4 Allow the coffee to steep for a few minutes, then remove the filter and serve.

Tips for Optimal Flavor

An vital tip for brewing with a Chemex is to use high-quality, freshly roasted coffee beans for the best flavor. It’s also crucial to pre-wet the coffee grounds before brewing to ensure they are evenly saturated and to release trapped gases for better extraction.

  • Experiment with different coffee-to-water ratios and brewing times to find your perfect cup.

On top of that, using a gooseneck kettle can give you more control over the water flow, which is vital for a consistent and balanced extraction. After mastering the basics, don’t be afraid to get creative with different brewing techniques to enhance the flavors of your coffee.

This classic brewing method may take a few tries to get the hang of, but the results are well worth the effort. Experimenting with grind size, water temperature, and pouring technique can help you unlock a world of flavors in your daily cup of coffee.

Benefits of Using a Chemex

Once again, if you’re wondering why Chemex coffee makers are highly praised in the coffee enthusiast community, a visit to Why are Chemex so praised? : r/Coffee might give you a glimpse. These elegant yet simple brewers offer several advantages that make them stand out in the world of coffee brewing.

Clean and Balanced Flavor

The Chemex is known for producing a clean and balanced flavor profile that highlights the nuances of the coffee beans without any bitterness or sediment. The thick filter paper removes oils and any fine particles, resulting in a crisp and smooth cup of coffee that is highly enjoyable for many enthusiasts.

Easy to Clean and Maintain

Cleanliness and maintenance are crucial in coffee brewing, and the Chemex excels in this aspect. The glass body is easy to clean with soap and water, and the wooden collar and leather tie can be removed for washing. Additionally, the Chemex filters are disposable, making cleanup a breeze after brewing a delicious pot of coffee.

Maintain

The Chemex is not only easy to clean but also simple to maintain. With proper care, such as regular cleaning and replacing worn-out parts, a Chemex can last for years, making it a durable and sustainable brewing option for coffee lovers.

Versatility in Brewing Methods

For coffee aficionados who appreciate variety in their brewing methods, the Chemex offers versatility. Whether you prefer hot pour-over coffee, iced coffee, or even experimenting with cold brew techniques, the Chemex can adapt to different styles of coffee preparation, giving you the freedom to explore and enjoy various brewing methods.

Methods

Its unique design and functionality allow users to control brewing variables such as water temperature, grind size, and pour rate, making it a versatile brewing tool for those who want to tailor their coffee-making process to suit their preferences.

Comparison to Other Brewing Methods

For Brew Guide: Chemex | How to Use the …, let’s compare the Chemex to other popular brewing methods to understand its uniqueness and advantages.

Drip Brewing

The Drip Brewing method, popular in devices like the traditional coffee maker, drips hot water over coffee grounds held in a filter. This process extracts the coffee slowly, resulting in a smooth and consistent flavor. The Chemex takes a similar approach but offers a more hands-on experience and the ability to control variables like water temperature and pouring technique to achieve a customized brew.

French Press

French Press brewing involves steeping coffee grounds in hot water and then pressing them down with a plunger. This method produces a rich and full-bodied coffee with a robust flavor profile. While the French Press offers a bold cup, the Chemex delivers a cleaner and more nuanced taste by using a paper filter to remove oils and sediment, resulting in a lighter mouthfeel.

A French Press creates a full-bodied coffee with a thick texture due to fine particles escaping through the mesh filter. This can sometimes leave a slight bitterness in the brew, unlike the cleaner profile achieved with a Chemex.

Pour-over

Methods such as the Hario V60 and Kalita Wave fall under the Pour-over category, where hot water is poured over coffee grounds in a filter. The main difference between the Chemex and these pour-over devices lies in the Chemex’s thicker filter and unique hourglass shape, allowing for a slower brew time and enhanced extraction of flavors.

The Chemex’s design, including the bonded filters and thick paper material, gives the brewer greater control over the extraction process, resulting in a well-balanced and flavorful cup of coffee.

Other

Common Misconceptions about Chemex

Is it Difficult to Use?

Not at all. One common misconception about the Chemex is that it is difficult to use. In reality, it is quite simple and straightforward. All you need to do is place a filter in the Chemex, add your ground coffee, pour hot water over it in a slow and steady manner, and let it drip through. The whole process is not only user-friendly but also allows you to have full control over the brewing variables to create a delicious cup of coffee.

Is it Only for Coffee Snobs?

Only those who have not tried using a Chemex would claim that it is only for coffee snobs. The truth is that anyone can use a Chemex to brew their coffee, regardless of their level of expertise or snobbery. The simplicity of the Chemex design and the quality of coffee it produces make it a versatile brewing method suitable for coffee enthusiasts of all kinds.

To think that the Chemex is only for coffee snobs is to underestimate its accessibility and versatility. Whether you are a coffee aficionado or just someone who enjoys a good cup of joe, the Chemex can cater to your brewing needs without any pretentiousness.

Final Words

The Chemex is a simple yet effective brewing device that produces a clean and flavorful cup of coffee. Its elegant design and use of paper filters result in a smooth and rich coffee without any sediment. By following the proper brewing method, one can easily create a great cup of coffee using a Chemex.

The Chemex’s unique hourglass shape, wooden collar, and leather tie make it a stylish addition to any coffee lover’s collection. Its ease of use and ability to brew multiple cups at once make it a versatile and convenient brewing device. So next time you’re looking to elevate your coffee brewing experience, give the Chemex a try and enjoy a delicious cup of coffee.

FAQ

Q: What is a Chemex?

A: A Chemex is a glass coffee maker that is known for its elegant design and ability to produce a clean and flavorful cup of coffee.

Q: How is a Chemex different from other coffee makers?

A: Unlike other coffee makers, a Chemex uses a paper filter that is thicker than most, which results in a smooth and sediment-free coffee.

Q: What are the key components of a Chemex?

A: The key components of a Chemex include the glass carafe, the Chemex bonded filters, and the wooden collar and tie, which serve as a handle.

Q: How is a Chemex used to make coffee?

A: To use a Chemex, you first place a Chemex bonded filter in the top of the carafe, add your coffee grounds, pour hot water over the grounds in a circular motion, and let it drip through the filter.

Q: What are some tips for using a Chemex?

A: Some tips for using a Chemex include rinsing the filter before adding the coffee grounds, using a gooseneck kettle for better control over pouring, and experimenting with the coffee-to-water ratio to find your preferred strength.

What are the best coffee regions in the world

How does coffee affect sleep

How is cold brew coffee made

What are the origins of coffee

How much caffeine is in a cup of coffee

How do you make Turkish coffee

With a few simple steps and a traditional cezve pot, you can brew a bold and flavorful cup of Turkish coffee. Start by grinding your coffee beans to a fine powder and placing them in the cezve with water and sugar. Slowly bring the mixture to a boil while stirring, then pour the coffee into a cup and let it settle before enjoying this rich and aromatic beverage. Follow these steps to savor the true essence of Turkish coffee at home.

Key Takeaways:

  • Use finely ground coffee: Turkish coffee requires a very fine grind to achieve its distinct taste and texture.
  • Pay attention to the foam: The hallmark of a well-made Turkish coffee is the rich foam that forms on top, signaling the perfect brewing process.
  • Practice patience: Making Turkish coffee is a slow and deliberate process that requires careful attention to heat and timing for the best results.

Gathering Ingredients and Equipment

Essential Ingredients

To make a delicious cup of Turkish coffee, you will need finely ground Turkish coffee beans, cold water, and sugar (optional) to suit your taste. Traditional Turkish coffee is prepared with unfiltered coffee, so make sure you have the right grind for an authentic experience.

Specialized Equipment

To brew Turkish coffee, you will require a cezve, a small, long-handled pot specifically designed for making this style of coffee. A small spoon for stirring, and demitasse cups to serve the coffee in are also recommended to complete the experience.

On your quest for the perfect Turkish coffee, you might consider investing in a briki, a Greek version of the cezve, particularly if you can’t find a traditional cezve. Briki is a great alternative and will give you similar results when brewing Turkish coffee.

This chapter covers the key ingredients and tools necessary for mastering the art of brewing Turkish coffee. With the right combination of quality beans, water, and the appropriate equipment, you are well on your way to creating a delightful cup of this time-honored beverage.

Measuring and Grinding Coffee

Measuring Coffee Quantity

Coffee, the heart and soul of Turkish coffee, requires precise measurement to achieve that perfect balance of flavor and strength. For a single cup of Turkish coffee, you will need one demitasse cup of water and one heaping teaspoon of finely ground coffee. Adjust the amount of coffee based on your preference, but remember, it is the ratio that makes Turkish coffee unique.

Grinding Coffee Beans to Perfection

Coffee, the core element of Turkish coffee, demands a meticulous approach to grinding to unlock its full potential. The beans must be ground to an extremely fine consistency, almost powdery, resembling caster sugar. This fineness ensures that the coffee fully infuses in the water during the brewing process, resulting in a velvety texture and rich flavor that is distinctively Turkish.

Another crucial aspect of grinding coffee beans for Turkish coffee is to grind them just before brewing. This preserves the freshness and aroma of the coffee, elevating the overall experience of indulging in a cup of this ancient delight.

Heating the Ibrik

Once again, if you want to learn more about the complete process of making Turkish coffee, I highly recommend checking out this comprehensive guide on How to Make Turkish Coffee – A Brewing Guide. It will provide you with detailed steps and tips to perfecting this traditional brewing method.

Choosing the Right Heat Source

Any heat source that allows you to control the temperature precisely is suitable for heating the Ibrik. Whether you prefer a gas stove, electric stove, or even a portable burner, the key is to have a consistent and adjustable heat source to achieve the ideal brewing conditions.

Heating the Ibrik to the Ideal Temperature

With Turkish coffee, the ideal brewing temperature is around 165-175°C (329-347°F) to ensure the coffee grounds are brewed to perfection without burning. The Ibrik should be heated slowly and steadily to reach this temperature range and maintain it throughout the brewing process.

For instance, you can use a thermometer to monitor the Ibrik’s temperature accurately. Heating it too quickly or reaching a temperature above the recommended range can result in a bitter taste, disrupting the delicate flavors of the coffee. Take your time and be patient to achieve the perfect brewing temperature for a delightful cup of Turkish coffee.

Adding Coffee and Water

Unlike Making Turkish coffee with a cezve, preparing Turkish coffee requires a delicate balance of adding the right amount of coffee grounds and water to the ibrik.

Adding Coffee Grounds to the Ibrik

Coffee grounds are an important component of Turkish coffee, providing the rich and robust flavor that this traditional brew is known for. When adding the grounds to the ibrik, it’s crucial to use a finely ground coffee to ensure a smooth and consistent texture in the final cup.

Pouring in the Right Amount of Water

One of the key steps in making Turkish coffee is pouring the correct amount of water into the ibrik. This precise measurement plays a vital role in determining the strength and flavor of the coffee. It’s important to follow the traditional ratio of one cup of water to one heaping teaspoon of coffee grounds for the perfect brew.

Plus, remember not to stir the mixture after adding water. Instead, gently swirl the ibrik to combine the water and coffee grounds, allowing them to infuse and create a harmonious blend of flavors.

Brewing the Coffee

Waiting for the Perfect Crema

After patiently waiting for the coffee to brew, it’s time for the most crucial moment – waiting for the perfect crema to appear. This rich layer of foam on top of the coffee is a sign of a well-brewed Turkish coffee.

For the best results, allow the coffee to brew on low heat until it starts to froth and bubble. Keep a watchful eye on the pot to catch the crema just as it forms, ensuring a flavorful and aromatic cup of Turkish coffee.

Stirring and Serving

Stirring the freshly brewed Turkish coffee is imperative to mix the grounds evenly and create a harmonious flavor profile. Use a small spoon to gently stir the coffee before serving, ensuring that each cup is consistent in taste.

For an authentic experience, serve the Turkish coffee in small cups accompanied by a glass of cold water. The cold water serves as a palate cleanser between sips and enhances the overall enjoyment of this traditional beverage.

Understanding the art of stirring and serving Turkish coffee is key to mastering the brewing process. By following these simple steps, you can savor the rich flavors and cultural heritage that this beloved drink embodies.

Serving and Enjoying

Traditional Turkish Coffee Serving Style

Your Turkish coffee is ready, and now it’s time to serve it in the traditional style. An important aspect of Turkish coffee culture is the presentation. The coffee is poured into small cups called “fincan” and served on a metal tray along with a glass of water to cleanse the palate between sips.

Pairing with Sweets and Snacks

Traditional Turkish coffee is often enjoyed with a side of sweet treats like Turkish delight or baklava. These desserts complement the strong and rich flavors of the coffee, creating a delightful harmony for your taste buds.

Snacks like pistachios, almonds, or even dried fruits can also be paired with Turkish coffee to enhance the overall experience. The combination of the intense coffee flavor with the sweetness of the treats makes for a perfect Turkish coffee ritual.

To wrap up

Now that you have learned the traditional way to make Turkish coffee, you can impress your friends and family with this flavorful and aromatic brew. Remember to use finely ground coffee beans, sugar to taste, and a cezve to achieve that authentic taste. Enjoy the experience of making and savoring this delightful beverage that has been a part of Turkish culture for centuries.

FAQ

Q: What is Turkish coffee?

A: Turkish coffee is a traditional method of brewing coffee that originated in Turkey. It is known for its strong flavor and rich texture.

Q: What ingredients do you need to make Turkish coffee?

A: To make Turkish coffee, you will need finely ground coffee beans, water, and sugar (optional).

Q: How do you make Turkish coffee?

A: To make Turkish coffee, start by adding water and sugar (if desired) to a cezve (Turkish coffee pot). Bring it to a simmer. Then, add finely ground coffee and simmer again. Pour into a cup once the coffee grounds settle.

Q: What is the traditional way to serve Turkish coffee?

A: Turkish coffee is traditionally served in small cups without handles, accompanied by a glass of water to cleanse the palate.

Q: How is Turkish coffee different from other types of coffee?

A: Turkish coffee is unique in the way it is prepared, as the coffee grounds are simmered with water to create a strong and flavorful brew. It is typically unfiltered, resulting in a rich and thick texture.

The Ultimate Guide to Brewing the Perfect Cup of Black Coffee at Home

What is a Moka pot

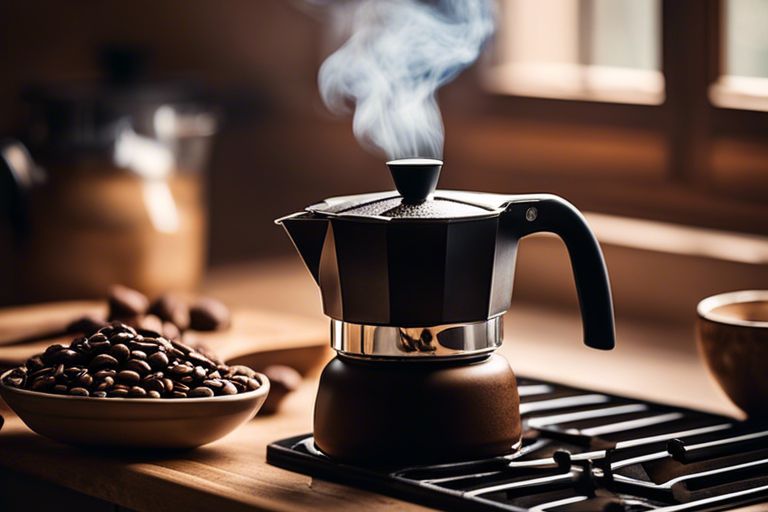
It’s time to demystify the humble Moka pot – a classic coffee maker cherished by espresso lovers worldwide. The Moka pot, also known as a stovetop coffee maker, is a simple yet ingenious device designed to brew a strong and flavorful coffee that rivals the taste of espresso. This article will explore into the history, construction, and brewing process of the iconic Moka pot, allowing you to brew your perfect cup of stovetop coffee with ease. So, grab your favorite coffee beans and let’s explore the world of the Moka pot.

Key Takeaways:

  • Moka pot: A stovetop coffee maker that brews coffee by passing boiling water pressurized by steam through ground coffee.
  • Design: Consists of lower chamber for water, middle chamber for ground coffee, and upper chamber for final brewed coffee.
  • History: Invented in 1933 by Alfonso Bialetti and remains a popular choice for coffee enthusiasts seeking a strong, espresso-like brew at home.

Origins

The Moka Pot Is an Inexpensive Espresso Alternative that has found its way into many kitchens worldwide. This iconic stovetop coffee maker has a rich history and interesting origins that have contributed to its enduring popularity.

History of the Moka pot

Origins of the Moka pot date back to the early 1930s in Italy. Created by engineer Alfonso Bialetti, the Moka pot was designed as a simple, affordable, and efficient way to brew coffee that resembled espresso. Its distinctive octagonal shape and aluminum construction quickly made it a staple in Italian households and later, in kitchens around the globe.

Inventor and patent information

With its invention credited to Alfonso Bialetti, the Moka pot gained popularity after he acquired a patent for the design in 1933. Fueled by Bialetti’s innovative spirit and a desire to create a coffee maker that was accessible to the masses, the Moka pot soon became a household crucial in Italy and beyond.

Understanding the origins and the creative mind behind the Moka pot adds a layer of appreciation for this humble yet effective coffee maker that has stood the test of time.

Design and Functionality

Unique stovetop brewing system

To truly understand the design and functionality of a Moka pot, you need to grasp its unique stovetop brewing system. This system is what sets the Moka pot apart from other coffee makers. It works by using steam pressure to push hot water through coffee grounds, resulting in a strong and flavorful espresso-like brew.

Materials used in construction

Design plays a crucial role in the functionality of a Moka pot, especially concerning the materials used in its construction. Typically made of stainless steel or aluminum, these materials are chosen for their durability and heat-conducting properties. Stainless steel models are favored for their modern aesthetic and longevity, while aluminum ones are known for their excellent heat distribution.

Plus, some Moka pots feature ergonomic handles and knobs that stay cool to the touch, making them safe and easy to handle even when brewing piping hot coffee.

Heat distribution and pressure control

An vital aspect of a Moka pot’s design is its ability to evenly distribute heat and control pressure during the brewing process. This ensures that the coffee grounds are extracted efficiently, resulting in a rich and aromatic coffee with a velvety crema on top. Additionally, the pressure control mechanism helps prevent the coffee from boiling or burning, maintaining the perfect brewing temperature.

Understanding the science behind these key design elements can enhance your appreciation for the art of brewing coffee with a Moka pot.

How it Works

Now, let’s examine how a Moka pot works to brew that perfect cup of coffee. The Moka pot operates on a simple yet effective process that relies on water pressure to brew a strong, aromatic coffee often likened to espresso.

Step-by-step brewing process

Step 1 Fill the bottom chamber with water up to the safety valve.
Step 2 Insert the filter basket and fill it with finely ground coffee.
Step 3 Screw on the top chamber securely.
Step 4 Place the Moka pot on the stove and heat until the coffee starts to gurgle up into the top chamber.
Step 5 Once the top chamber is full of coffee, remove from heat and pour into your cup.

Science behind the Moka pot’s operation

processThe Moka pot works based on a simple yet effective principle of water vapor pressure building up in the bottom chamber due to the heat from the stove. This pressure pushes hot water up through the coffee grounds in the filter basket and into the top chamber, creating a strong coffee concentrate.

Stepbystep This process is similar to how espresso is made, but with lower pressure and a gentler extraction. The result is a flavorful and intense coffee that is richer than drip coffee but less concentrated than espresso.

Tips for optimal use

  • Use freshly ground coffee for the best flavor.
  • Grind the coffee to a fine consistency, similar to table salt.
  • Avoid packing the coffee too tightly in the filter basket to allow for proper water flow.

Works Knowing these tips can help you master the art of brewing coffee with a Moka pot and enjoy a delicious cup every time.

To wrap up, understanding how a Moka pot works and the science behind its operation can enhance your coffee-making experience and help you appreciate the unique brewing method it offers. By following the step-by-step process and implementing tips for optimal use, you can brew a flavorful cup of coffee that rivals your favorite café.

Benefits

Rich flavor and aroma

To experience a rich and full-bodied flavor in your coffee, the Moka pot is a must-have in your kitchen arsenal. Its brewing process allows the water to extract the coffee grounds’ oils, resulting in a robust and aromatic cup of coffee that rivals any espresso.

Cost-effective and eco-friendly

Cost-effective and eco-friendly, the Moka pot offers a budget-friendly way to enjoy quality coffee without the need for expensive machines or single-use pods. With its durable design and reusable components, it’s a sustainable choice for coffee lovers looking to reduce their environmental footprint.

In addition to being environmentally conscious, the Moka pot is also a cost-effective option for long-term use. While espresso machines can be costly to purchase and maintain, a Moka pot is an affordable initial investment that requires minimal upkeep, making it a practical choice for those mindful of their budget.

Versatility in brewing options

Ecologically sound in its design, the Moka pot offers versatility in brewing options, allowing you to experiment with different coffee blends, grind sizes, and brewing techniques. Whether you prefer a strong espresso-like shot or a milder coffee, the Moka pot can cater to your taste preferences with ease.

With its ability to brew various styles of coffee, the Moka pot is a versatile tool that can adapt to your changing coffee cravings. Whether you enjoy a quick morning espresso or a leisurely afternoon coffee, the Moka pot provides the flexibility to customize your brew to suit your mood.

Types of Moka pots

Despite its simple design, the Moka pot comes in various types that cater to different preferences and needs. When choosing a Moka pot, it is imperative to consider the material, size, and whether you prefer an electric or stovetop model. Knowing the differences between these types can help you find the perfect Moka pot for your brewing routine.

Aluminum vs. stainless steel vs. copper

One significant factor to consider when selecting a Moka pot is the material it is made of. The most common materials used in Moka pots are aluminum, stainless steel, and copper. Each material has its benefits and drawbacks, ranging from heat conductivity to durability.

Aluminum Stainless Steel
Lightweight Durable
Affordable Resistant to rust
Excellent heat conduction Modern look
Can impart a slight metallic taste More expensive
Not suitable for induction stoves Heavier than aluminum

In terms of choosing between aluminum, stainless steel, and copper Moka pots, it ultimately boils down to personal preference and brewing habits.

Size variations and capacity

Aluminum Moka pots are the traditional choice and are favored by purists for their ability to enhance the flavors of the coffee. They are also lightweight and affordable, making them a popular option for beginners or those on a budget.

When selecting a Moka pot, consider the size variations and capacity that best suit your coffee consumption habits. Moka pots typically range from 1-cup to 12-cup capacities, allowing you to brew a single serving or make coffee for a group of friends.

Electric and stovetop models

An electric Moka pot is a convenient option for those who prefer a hands-off brewing experience. These models often come with automated features like timers and keep warm functions, perfect for busy mornings when you need a quick caffeine fix.

When choosing between electric and stovetop models, consider your brewing preferences and lifestyle to find the Moka pot that best fits your needs.

Maintenance and Care

Cleaning and Descaling

Cleaning your Moka pot regularly is necessary to maintain its performance and flavor. Rinse the pot with warm water after each use and avoid using soap, as it can leave a residue that affects the taste of your coffee. To deep clean, disassemble the Moka pot and scrub it with a brush to remove any coffee oils or residues. Descaling is necessary to prevent mineral buildup, which can affect the brewing process. Use a descaling solution or a mixture of water and vinegar to clean the inside of the pot thoroughly.

Storage and Handling Tips

  • Store your Moka pot in a dry place to prevent rust and corrosion.
  • Avoid using abrasive cleaners that can damage the pot’s surface.

With proper care, your Moka pot can last for years and continue to brew delicious coffee. Make sure to dry the pot completely before storing it to prevent mold growth. Assume that any leftover coffee grounds can also affect the taste of your next brew.

Troubleshooting Common Issues

Care for your Moka pot by troubleshooting common issues that may arise. If your coffee tastes bitter, try using a coarser grind to prevent over-extraction. If the brewed coffee has a metallic taste, it could indicate mineral buildup, requiring a thorough descaling. Understanding how to address these issues will help you enjoy a consistently great cup of coffee from your Moka pot.

To wrap up

Upon reflecting on the article “What is a Moka pot”, it becomes evident that this brewing device has a rich history and a unique method of extracting coffee. Its simplicity in design and efficiency in producing a strong and flavorful coffee make it a popular choice among coffee enthusiasts. While modern coffee makers offer various features and brewing methods, the Moka pot remains a classic and timeless piece that continues to hold its place in many kitchens around the world.

FAQ

Q: What is a Moka pot?

A: A Moka pot is a stovetop coffee maker that brews coffee by passing boiling water pressurized by steam through ground coffee.

Q: How does a Moka pot work?

A: A Moka pot works by filling the bottom chamber with water, adding ground coffee to a filter basket, assembling the pot, and heating it on a stovetop until the water boils and coffee is brewed into the upper chamber.

Q: What type of coffee does a Moka pot produce?

A: A Moka pot produces a strong and concentrated coffee similar to espresso, but with a different flavor profile due to the brewing process.

Q: Is it easy to use a Moka pot?

A: Yes, using a Moka pot is relatively easy once you get the hang of it. It requires a bit of practice to achieve the perfect brew, but it’s a simple and satisfying way to make coffee at home.

Q: How do you clean a Moka pot?

A: To clean a Moka pot, disassemble it after each use, wash the parts with warm water and mild detergent, and make sure to dry it thoroughly to prevent rust. Avoid using soap or putting it in the dishwasher to maintain the flavor of your coffee.

What are the best coffee regions in the world

How does coffee affect sleep

How is cold brew coffee made

What are the origins of coffee

How much caffeine is in a cup of coffee

How do you make a café au lait

Café lovers, gather around as we launch on a delightful journey to learn how to make a perfect café au lait, just like they do in charming Parisian cafes. This classic French coffee drink combines bold coffee with smooth steamed milk for a truly comforting and delicious experience. With a few simple steps and a touch of finesse, you’ll be sipping on your own homemade café au lait in no time. Let’s grab our favorite mug and get brewing!

Key Takeaways:

  • Café au lait: A café au lait is a delicious French coffee drink made with equal parts of brewed coffee and hot steamed milk.
  • Brewed Coffee: Start by brewing a strong pot of coffee using your preferred method – French press, espresso machine, or drip coffee maker.
  • Steamed Milk: Heat milk in a saucepan until it is hot but not boiling. Use a milk frother or whisk vigorously to create a creamy foam.
  • Equal Parts Mixture: To make the café au lait, pour equal parts of brewed coffee and steamed milk into a cup. Stir gently to combine the flavors.
  • Enjoy Your Beverage: Finish by indulging in your homemade café au lait. Sip slowly and savor the rich coffee taste blended with velvety milk for a delightful experience.

Gathering Ingredients and Equipment

Essential Ingredients for a Classic Café au Lait

With just a few simple ingredients, you can create a delightful café au lait at home. The two key components you will need are freshly brewed coffee and steamed milk.

The Right Coffee Beans for the Job

The foundation of a good café au lait is high-quality coffee beans. When choosing coffee beans for your drink, opt for a medium to dark roast with a smooth, rich flavor profile. These roasts complement the creamy texture of the steamed milk perfectly, creating a harmonious blend of flavors in your café au lait.

The type of coffee beans you choose can greatly impact the overall taste of your café au lait. Experiment with different roasts and origins to find the perfect match for your preferences.

Equipment

Selecting the Perfect Milk

Any type of milk can be used to make a café au lait, but whole milk or 2% milk is commonly preferred for its creamier texture and richer taste. For a dairy-free alternative, you can opt for almond milk, oat milk, or soy milk. Be sure to choose a milk that complements the flavor profile of your chosen coffee beans for the best results.

When choosing milk for your café au lait, consider factors such as fat content, flavor profile, and dietary preferences. The right milk can enhance the overall experience of your drink, so choose wisely.

Brewing the Perfect Coffee

Even before you start your day, brewing a perfect café au lait begins with choosing the right coffee and water ratio.

Choosing the Right Coffee-to-Water Ratio

One of the keys to a rich and flavorful café au lait is getting the coffee-to-water ratio just right. A general rule of thumb is to use about 1 to 2 tablespoons of coffee for every 6 ounces of water. However, feel free to adjust this ratio according to your personal taste preferences. Experiment with different ratios until you find the perfect balance of strength and flavor that suits your palate.

The Art of French Press Coffee

Coffee-to-Water ratio is crucial for a delicious French Press brew. The French Press method involves steeping coarsely ground coffee beans in hot water before pressing them to the bottom of the pot. To achieve the perfect French Press coffee, use a ratio of 1:15 coffee to water. This method allows for a full extraction of flavors from the coffee beans, resulting in a rich and aromatic cup of coffee.

To master the art of French Press coffee, start by preheating the press with hot water. Then, add your coarsely ground coffee beans to the press and pour hot water over them. Let the coffee steep for about 4 minutes before pressing down the plunger slowly. Enjoy the rich aroma and robust flavor of your freshly brewed French Press coffee.

Tips for Achieving the Ideal Brew

To achieve the ideal brew for your café au lait, consider the following tips:

  • Use freshly ground coffee beans for the best flavor.
  • Adjust the grind size according to your brewing method.
  • Experiment with different water temperatures to find the perfect balance.

Brewing a perfect café au lait is a delicate balance of art and science. Any slight variation in the coffee-to-water ratio or brewing method can impact the flavor and quality of your brew.

Preparing the Milk

Whole Milk, Half-and-Half, or a Non-Dairy Alternative?

Now, when it comes to preparing a delicious café au lait, the type of milk you choose is crucial. Many traditionalists swear by using whole milk for a rich and creamy texture. However, if you prefer a slightly lighter option, you can opt for half-and-half. For those with dietary restrictions or preferences, non-dairy alternatives like almond milk, oat milk, or soy milk can also be excellent choices.

Heating the Milk to Perfection

Whole milk or your preferred alternative should be heated gently on the stovetop or with a milk frother until it reaches around 150°F. This temperature is ideal for creating a creamy texture without scalding the milk. Be sure to keep an eye on the milk and stir occasionally to prevent it from overheating or forming a skin on top.

This step is crucial in achieving the perfect balance of flavors in your café au lait. Heating the milk to the right temperature helps unlock its natural sweetness and enhances the overall taste of the coffee blend.

Creating a Silky Microfoam

An important aspect of a delicious café au lait is the velvety microfoam that sits atop the coffee. To achieve this, steam the heated milk using a milk frother or a French press until it becomes smooth and silky. The goal is to create tiny bubbles that will add a luxurious texture to your beverage.

Milk frothing can be a bit tricky at first, but with practice and patience, you can master the art of creating the perfect microfoam for your café au lait. The key is to heat and froth the milk gradually while experimenting with different techniques to find what works best for you.

Combining Coffee and Milk

The Classic 1:1 Ratio

Unlike a traditional latte, which has more milk than coffee, a café au lait is all about balance. The classic way to make this delightful beverage is by combining equal parts of freshly brewed coffee and steamed milk.

Customizing to Your Taste Preferences

Customizing your café au lait to suit your taste buds is part of the fun of making this French-inspired drink. Any coffee lover knows that the perfect cup is a reflection of your personal preferences.

Customizing your café au lait can involve experimenting with different types of coffee beans, adjusting the sweetness level with sugar or flavored syrups, or even adding a sprinkle of cinnamon or cocoa powder on top for a little extra flair.

Techniques for a Smooth, Velvety Texture

The key to achieving a velvety texture in your café au lait lies in the way you steam and froth the milk. Your goal is to create microfoam with tiny bubbles that blend seamlessly with the coffee, resulting in a smooth and creamy mouthfeel.

Your choice of milk can also impact the texture of your café au lait. Whole milk will provide a richer and creamier taste, while skim milk will result in a lighter and less indulgent beverage.

Ratio is important in achieving the right balance of coffee and milk, ensuring that neither flavor overpowers the other. Finding the perfect ratio will ultimately depend on your personal preferences, so don’t be afraid to experiment until you discover your ideal combination.

Adding Flair and Flavor

Despite the classic and simple nature of a café au lait, there are ways to add flair and flavor to your drink. A Pinch of Cinnamon or a Dash of Vanilla can elevate your café au lait to another level of deliciousness. The warmth of cinnamon or the sweetness of vanilla can complement the boldness of the coffee and richness of the milk.

A Pinch of Cinnamon or a Dash of Vanilla

The addition of a pinch of cinnamon or a dash of vanilla can bring a new dimension to your café au lait. Sprinkle a bit of cinnamon on top of your drink for a warming spice that pairs beautifully with the coffee. Alternatively, add a drop or two of vanilla extract to the milk before frothing to infuse your café au lait with a subtle sweetness.

Whipped Cream and Other Toppings

Toppings like whipped cream, chocolate shavings, or caramel drizzle can take your café au lait to a decadent level. The creamy texture of whipped cream adds a luxurious touch to the drink, while chocolate shavings or caramel drizzle provide a delightful contrast to the rich flavors of the coffee and milk.

Understanding how different toppings can enhance the flavor profile of your café au lait allows you to get creative and customize your drink to suit your preferences. Whether you prefer a subtle hint of sweetness or a more indulgent treat, there are endless possibilities to explore when it comes to toppings for your café au lait.

Experimenting with Spiced Simple Syrups

Dash into the world of spiced simple syrups to create unique and flavorful variations of your café au lait. Infusing simple syrup with spices like cinnamon, nutmeg, or cardamom can add depth and complexity to your drink. Experiment with different spice combinations to find the perfect blend that suits your taste.

Whipped cream and other toppings are not just for aesthetic purposes but also play a crucial role in enhancing the overall taste sensation of your café au lait. The combination of textures, flavors, and aromas from toppings can create a memorable and delightful drinking experience that keeps you coming back for more.

Serving and Enjoying

Keep in mind that the way you serve and enjoy your café au lait can greatly enhance the overall experience. For a detailed step-by-step guide on making a delicious café au lait, check out this Café au lait recipe.

The Art of Presentation

On a tray or a cozy coffee nook, present your café au lait with a delicate saucer and a freshly stirred spoon. Sprinkle a dash of cinnamon or cocoa powder on top for an elegant touch. The visual appeal adds to the anticipation of savoring this classic French coffee creation.

Pairing Your Café au Lait with Sweet Treats

Any fresh pastry like croissants, pain au chocolat, or madeleines pairs wonderfully with a warm cup of café au lait. The buttery and flaky textures of these treats complement the creamy richness of the coffee, creating a perfect balance of flavors for a delightful breakfast or afternoon snack.

The warm, comforting notes of the café au lait elevate the sweetness of pastries, creating a harmonious blend that indulges your senses. Enjoy a leisurely moment sipping your coffee and savoring each bite of your chosen treat, letting the flavors mingle on your palate.

Savoring the Experience

On a leisurely morning or a relaxed afternoon, take a moment to savor your café au lait slowly. Close your eyes and breathe in the rich aroma, letting the warmth of the cup envelop your hands. Sip the coffee slowly, allowing the creamy texture to linger on your tongue, and appreciate the simple pleasure of this classic beverage.

This moment of tranquility and indulgence is a reminder to pause and enjoy the simple joys in life. Whether alone with a book or sharing a conversation with a loved one, savoring a café au lait is a delightful ritual that can brighten your day and elevate your spirits.

Conclusion

Conclusively, mastering the art of making a café au lait is a delightful process that can elevate your morning coffee routine. By following the step-by-step instructions in this guide, you can create a creamy and satisfying beverage that combines the bold flavors of coffee with the smoothness of steamed milk. For more tips and variations on making the perfect café au lait, feel free to explore this Cafe Au Lait recipe.

FAQ

Q: What is a café au lait?

A: A café au lait is a French coffee drink that consists of equal parts of hot coffee and hot steamed milk.

Q: What ingredients do I need to make a café au lait?

A: To make a café au lait, you will need freshly brewed coffee and steamed milk.

Q: How do I brew the coffee for a café au lait?

A: Brew a strong pot of coffee using your preferred method, such as a French press or a drip coffee maker.

Q: How do I steam the milk for a café au lait?

A: Heat milk in a saucepan on the stove over medium heat, stirring constantly until it is steaming but not boiling. You can also use a milk frother or a steam wand if you have an espresso machine.

Q: What is the ratio of coffee to steamed milk in a café au lait?

A: The traditional ratio for a café au lait is 1:1, which means equal parts of coffee and steamed milk.

Q: Can I add flavorings to my café au lait?

A: Yes, you can customize your café au lait by adding flavorings such as vanilla, caramel, or cinnamon to suit your taste preferences.

Q: How do I serve a café au lait?

A: Pour the brewed coffee into a cup, then top it off with the steamed milk. You can also garnish with a sprinkle of cocoa powder or cinnamon for a decorative touch.

How do you make a breve

The Ultimate Guide to Brewing the Perfect Cup of Black Coffee at Home

How do you make a matcha latte

Matcha, a vibrant and antioxidant-packed green tea powder, is the star of this deliciously frothy matcha latte. Embrace the art of whisking as we guide you through the steps to create a creamy, earthy, and energizing drink right in your own kitchen. With a few simple ingredients and a bit of practice, you’ll be sipping on your homemade matcha latte in no time. Let’s dive in and discover the magic of this delightful beverage!

Key Takeaways:

  • Quality Matcha: Start with high-quality matcha powder for a rich and flavorful latte.
  • Whisking Technique: Use a bamboo whisk to blend the matcha powder with hot water in a zig-zag motion until smooth.
  • Frothy Milk: Heat your milk of choice and froth it to your desired consistency using a frother or whisk.
  • Perfect Balance: Discover your ideal matcha to milk ratio to achieve a well-balanced and delicious latte.
  • Creative Variations: Experiment with different types of milk, sweeteners, or toppings to customize your matcha latte to your taste preference.

Gathering Ingredients

For a step-by-step guide on how to make the perfect Matcha Latte, be sure to check out this Matcha Latte Recipe! To start, the key to a delicious matcha latte is using high-quality matcha powder, fresh milk, and a sweetener of your choice.

Quality Matcha Powder

On your quest for the perfect matcha latte, selecting a premium quality matcha powder is important. Look for vibrant green powder that has a smooth texture and a fresh, grassy aroma. High-quality matcha will not only enhance the flavor of your latte but also provide a beautiful green hue that makes for an aesthetically pleasing drink.

Milk Options: Whole, Skim, or Non-Dairy

One of the delightful aspects of making a matcha latte is the freedom to choose your milk base. Whether you prefer the creaminess of whole milk, the lighter texture of skim milk, or the dairy-free options like almond or oat milk, the possibilities are endless. Each type of milk will impart a slightly different flavor and texture to your latte, so feel free to experiment and find your perfect matcha combination.

Whole milk tends to lend a rich and velvety texture to your latte, adding a luxurious creaminess that complements the earthy notes of matcha. If you’re looking for a more indulgent experience, whole milk is an excellent choice for creating a decadent matcha latte.

Sugar or Sweetener Alternatives

Alternatives to traditional sugar, such as honey, agave nectar, or even maple syrup, can add a delightful sweetness to your matcha latte without overpowering the delicate flavor of the matcha. Experiment with different sweeteners to find the perfect balance that suits your taste preferences. Do not forget, a little sweetness can elevate the flavors of your latte and create a harmonious blend of tastes.

When deciding on a sweetener for your matcha latte, consider the flavor profile you wish to achieve. Some sweeteners may offer subtle undertones that enhance the natural sweetness of the matcha, while others may provide a more pronounced sweetness. Choose wisely to create a perfectly balanced and satisfying drink.

Preparing the Matcha

Sifting and Measuring Matcha Powder

For the perfect matcha latte, start by sifting 1-2 teaspoons of matcha powder into a small bowl to remove any clumps. This will ensure a smooth and creamy texture in your latte. Use a bamboo whisk or spoon to gently break up any clumps and create a fine powder.

Heating Water to the Perfect Temperature

Matcha is delicate and can become bitter if exposed to boiling water. It’s best to heat your water to around 175°F (79°C) to 185°F (85°C) for the ideal cup of matcha. Boil water and then let it cool for a few minutes to reach the perfect temperature.

Matcha

Sifting and Measuring Matcha Powder Heating Water to the Perfect Temperature
Sift 1-2 teaspoons of matcha powder and break up clumps for a smooth texture. Heat water to 175-185°F (79-85°C) to prevent matcha from becoming bitter.

Plus

Don’t be afraid to experiment with different matcha brands and whisking techniques to find the perfect matcha latte that suits your taste preferences. The key is to enjoy the process of making and savoring this delightful green tea beverage!

Whisking the Matcha

Choosing the Right Whisk

Not all whisks are created equal when it comes to making the perfect matcha latte. For the best results, opt for a traditional bamboo whisk, also known as a chasen. The fine, thin tines of the whisk are designed to help break up any clumps in the matcha powder and create a smooth and frothy texture.

Whisking Techniques for a Smooth Latte

To achieve a velvety smooth matcha latte, start by sifting your matcha powder into a bowl to remove any lumps. Add a small amount of hot water and use the bamboo whisk to create a smooth paste. Then, slowly add the remaining hot water while whisking in a zig-zag motion until the mixture is frothy and well-combined.

Smooth and consistent whisking will help ensure that the matcha powder is fully dissolved and incorporated, resulting in a rich and flavorful latte. Don’t rush this step – take your time to whisk the mixture until it reaches a uniform consistency.

Combining the Matcha and Milk

Once again, it’s time to bring together the star of the show – the matcha – with the supporting act, the milk. The key to a delicious matcha latte lies in finding the perfect balance between the two components. Whether you prefer a stronger matcha flavor or a creamier latte, the ratios you choose will play a crucial role in achieving the ideal cup of green goodness.

Ratios for the Perfect Balance

Milk plays a vital role in a matcha latte, not only adding creaminess and richness but also balancing out the bitterness of the matcha. The classic ratio for a matcha latte is 1 teaspoon of matcha to 8 ounces of milk, but feel free to adjust according to your taste preferences. Some may enjoy a more intense matcha flavor and opt for a 1:6 ratio, while others who prefer a milder taste can go for a 1:10 ratio.

Tips for Frothing and Steaming Milk

In terms of frothing and steaming milk for your matcha latte, there are a few key tips to keep in mind. Start by choosing the right type of milk – whether it’s dairy or non-dairy, make sure it’s cold for best results. Froth the milk until it reaches a velvety, creamy texture, being careful not to overheat it as it can alter the taste.

  • Use a stainless steel pitcher for steaming milk, as it conducts heat well.
  • Aim for small, fine bubbles when frothing the milk for a smooth latte texture.
  • Keep a close eye on the temperature of the milk, aiming for around 150-155°F for the perfect latte.

Ratios also play a role in frothing and steaming milk for your matcha latte. A higher milk-to-matcha ratio may require more frothing to achieve the desired creamy consistency. Experiment with different ratios and frothing techniques to find what works best for you. Any leftover steamed milk can be stored in the refrigerator for future lattes or other coffee creations.

Adding Sweetness and Flavor

Sugar, Honey, or Syrup: Choosing Your Sweetener

Honey has long been a favorite natural sweetener for enhancing the taste of beverages, including matcha lattes. Its distinct flavor profile adds a delicious depth to your latte while providing a touch of sweetness. If you prefer a more traditional route, you can always opt for sugar or syrup to sweeten your drink. The key is to experiment with different sweeteners to find the perfect balance that suits your taste buds.

Vanilla, Cinnamon, or Other Flavorings

Adding additional flavors like vanilla or cinnamon can take your matcha latte to the next level. These warm and aromatic spices complement the earthy notes of matcha, creating a harmonious blend of flavors. You can also get creative with other flavorings like nutmeg, cardamom, or even a hint of citrus zest. The possibilities are endless, so don’t be afraid to mix and match until you find your signature matcha latte flavor.

Vanilla extract can add a subtle sweetness and depth to your matcha latte, creating a more complex flavor profile. A dash of cinnamon can bring a cozy warmth to the drink, perfect for chilly days or cozy evenings. Feel free to experiment with different combinations of flavorings to discover your favorite matcha latte variation.

Assembling the Latte

Keep the Matcha Latte Recipe handy as you assemble your delicious drink. Assembling a matcha latte is simple and fun, creating a beautiful, vibrant drink that is not only pleasing to the eye but also incredibly tasty.

Pouring the Matcha Mixture into a Cup

Any matcha lover knows that the key to a perfect matcha latte is getting the right balance of flavors. Once you have prepared the matcha mixture, carefully pour it into a cup, ensuring that you have a smooth and consistent texture without any clumps. This step sets the foundation for your delicious matcha latte.

Topping with Foam or Whipped Cream (Optional)

Into your assembled matcha latte, you can add a delightful touch by topping it with foam or whipped cream. This optional step not only adds a creamy texture but also brings an extra layer of indulgence to your drink. Whether you prefer a frothy foam or a dollop of whipped cream, the choice is yours to make your matcha latte even more special.

To elevate your matcha latte further, you can dust a sprinkle of matcha powder or add a drizzle of honey on top of the foam or whipped cream. These simple yet elegant additions not only enhance the visual appeal of your latte but also introduce subtle hints of sweetness and earthy flavors, making each sip a delightful experience.

To wrap up

Taking this into account, making a matcha latte can be a simple and delightful experience. With just a few key ingredients and tools, you can create a delicious and comforting drink to enjoy. Remember to use high-quality matcha powder, frothed milk, and a sweetener of your choice to personalize your latte to your liking. Embrace the process and have fun experimenting with different ratios and techniques to find your perfect matcha latte recipe. Cheers to your matcha-making adventures!

FAQ

Q: What is a matcha latte?

A: A matcha latte is a delicious and creamy beverage made with matcha powder, steamed milk, and a touch of sweetener.

Q: What ingredients do I need to make a matcha latte?

A: To make a matcha latte, you will need matcha powder, hot water, milk of your choice, and a sweetener such as honey or agave syrup.

Q: How do I prepare matcha powder for a latte?

A: To prepare matcha powder for a latte, start by sifting 1-2 teaspoons of matcha powder into a bowl to remove any clumps. Add a small amount of hot water and whisk vigorously until the matcha is smooth and frothy.

Q: How do I steam milk for a matcha latte?

A: To steam milk for a matcha latte, pour milk into a steaming pitcher and insert the steam wand just below the surface of the milk. Turn on the steam wand and heat the milk to your desired temperature, swirling the pitcher to create a velvety texture.

Q: How do I assemble a matcha latte?

A: To assemble a matcha latte, pour the prepared matcha into a cup, add steamed milk, and stir to combine. Sweeten to taste with honey or agave syrup, and enjoy!

Q: Can I make a matcha latte without a milk steamer?

A: Yes, you can make a matcha latte without a milk steamer. Simply heat milk in a saucepan on the stove until steaming, then froth it using a whisk or a handheld milk frother.

Q: How can I customize my matcha latte?

A: You can customize your matcha latte by using different types of milk such as almond or oat milk, adjusting the sweetness level to your preference, or adding flavors like vanilla or cinnamon.

How do you make a breve

The Ultimate Guide to Brewing the Perfect Cup of Black Coffee at Home

How do you make a cinnamon coffee

Many mornings can be improved with a delicious cup of cinnamon coffee. This simple yet delightful beverage combines the warmth of coffee with the comforting spice of cinnamon for a perfect pick-me-up. Follow these easy steps to create your own cozy cinnamon coffee at home, and soon you’ll be savoring each sip with joy and satisfaction.

Key Takeaways:

  • Quality coffee: Start with good quality coffee beans for the best flavor.
  • Fresh cinnamon: Grind fresh cinnamon sticks for a fragrant and flavorful addition to your coffee.
  • Brewing method: Choose your preferred brewing method, like pour-over or French press, to make your cinnamon coffee.
  • Adjust cinnamon to taste: Experiment with the amount of cinnamon to find your perfect balance of flavors.
  • Enjoy the process: Making cinnamon coffee can be a delightful experience, so take your time and savor the aromas as you create your perfect cup.

Gathering Ingredients

Essential Coffee Beans

For the perfect cup of cinnamon coffee, start with high-quality coffee beans. Look for a medium or dark roast to complement the warm, spicy flavors of cinnamon. Freshly ground beans will result in a more flavorful and aromatic coffee, so consider investing in a grinder and grinding just before brewing.

Cinnamon: The Magic Spice

On the quest for a delightful cinnamon coffee, don’t skimp on this magical spice. Ground cinnamon can easily be found at your local grocery store, or you can even grate your own cinnamon sticks for an even fresher flavor. Cinnamon adds a warm and comforting aroma to your coffee, elevating it to a cozy treat perfect for any time of day.

It’s important to note that a little goes a long way with cinnamon. Start with a small amount and adjust to taste, as its flavor can quickly overpower the coffee if too much is used. Additionally, consider sprinkling a pinch of cinnamon on top of your finished cup for an extra touch of flavor and visual appeal.

Sugar and Creamer Options

Sugar and creamer are optional additions to personalize your cinnamon coffee. If you have a sweet tooth, consider adding a teaspoon of sugar or your favorite sweetener to enhance the flavors of the coffee and cinnamon. For a creamy finish, add a splash of milk, cream, or a dairy-free alternative like almond or oat milk.

Sugar and creamer can help balance out the spiciness of the cinnamon and create a smoother, more indulgent cup of coffee. Feel free to experiment with different quantities to find your perfect balance of sweetness and creaminess.

Preparing the Coffee

Grinding the Beans

Some of the best cinnamon-flavored coffee starts with freshly ground beans. With a good-quality burr grinder, you can achieve a consistent grind size that will help extract the rich flavors of the coffee beans. For a cinnamon-infused coffee, a medium to coarse grind works best to allow the cinnamon to impart its flavor during the brewing process.

Brewing Methods: Drip, French Press, or Pour-Over

Beans can be brewed in various ways, such as drip, French press, or pour-over methods. Each method imparts a unique flavor profile to the coffee. Drip coffee makers are convenient and easy to use, typically producing a lighter-bodied brew. French press brewing allows for a full-bodied coffee with rich flavors, while pour-over methods offer a clean and bright cup of coffee.

Press

When using a French press, be sure to let the coffee steep for about 4 minutes before pressing down the plunger. This will help extract the full flavors of the coffee and cinnamon, resulting in a deliciously aromatic cup.

The Perfect Water Temperature

Pourover Temperature
Light Roast Coffee 195-205°F
Medium Roast Coffee 190-200°F
Dark Roast Coffee 180-195°F

The water temperature plays a crucial role in brewing the perfect cup of cinnamon coffee. For pour-over methods, the ideal water temperature ranges between 195-205°F for light roast coffee, 190-200°F for medium roast coffee, and 180-195°F for dark roast coffee. This range ensures proper extraction of flavors without scalding the coffee grounds.

Adding Cinnamon Flair

Cinnamon Stick Infusion

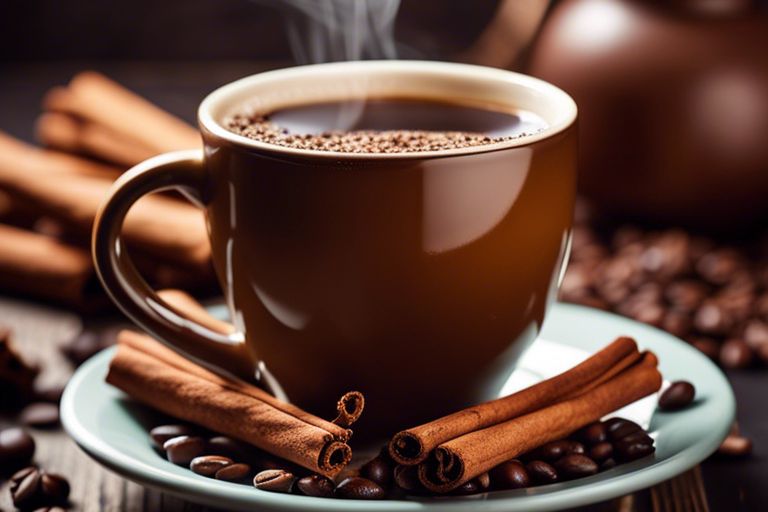
For an extra touch of warmth and spice in your cinnamon coffee, consider infusing a cinnamon stick into your brew. Simply place a cinnamon stick in your coffee mug before pouring in the hot coffee. Let it steep for a few minutes, allowing the rich cinnamon flavor to permeate the coffee. As you sip your coffee, the aroma of cinnamon will delight your senses and add a special flair to your morning routine.

Ground Cinnamon Sprinkle

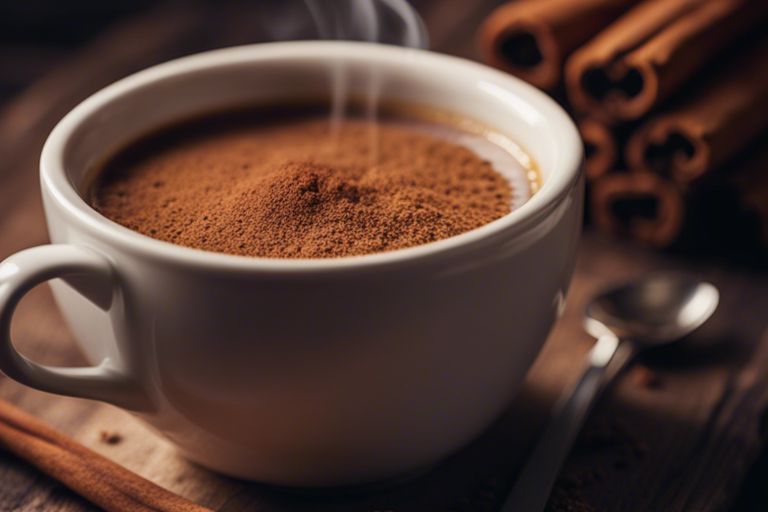
Ground cinnamon sprinkle is another way to add a burst of cinnamon flavor to your coffee. Simply sprinkle a pinch of ground cinnamon on top of your coffee or mix it in with your creamer for a delightful twist. The fine texture of ground cinnamon blends seamlessly with the coffee, creating a harmonious blend of flavors that will awaken your taste buds.

Ground cinnamon sprinkle is a versatile option that allows you to customize the level of cinnamon intensity in your coffee. Start with a small sprinkle and adjust to your taste preferences, adding more cinnamon for a bolder flavor or keeping it subtle for a hint of spice.

Cinnamon Syrup: A Sweet Alternative

Flair up your cinnamon coffee with a homemade cinnamon syrup. This sweet alternative adds not only the warm, spicy flavor of cinnamon but also a touch of sweetness to your morning cup of coffee. To make cinnamon syrup, simply combine water, sugar, and cinnamon in a saucepan and simmer until the sugar is dissolved and the mixture is fragrant. Allow it to cool before stirring it into your coffee for a decadent and flavorful treat.

Cinnamon syrup is a delicious way to elevate your coffee drinking experience. The syrup adds depth and complexity to your coffee, transforming it into a special indulgence that is perfect for cozy weekends or entertaining guests. Experiment with different levels of sweetness and cinnamon potency to find the perfect balance that suits your taste.

Balancing Flavors

Despite the simplicity of a cinnamon coffee, achieving the perfect balance of flavors is imperative for a delightful drinking experience. From sweetness to spice, every element plays a crucial role in creating a harmonious blend that tantalizes the taste buds.

Sugar and Spice: Finding the Perfect Ratio

For a well-balanced cinnamon coffee, the ratio of sugar to cinnamon is key. Start by adding a small amount of ground cinnamon to your coffee grounds before brewing. This will infuse the coffee with a subtle cinnamon flavor. To sweeten, add a touch of sugar or a drizzle of honey to complement the warm spice. Taste as you go and adjust the ratio until you find the perfect combination that suits your palate.

Creamer Options: Dairy, Non-Dairy, or None at All

Sugar

As far as creamer for your cinnamon coffee, the choice between dairy, non-dairy, or enjoying it black is a personal one. Dairy creamers like milk or cream can add a rich and velvety texture to your coffee, while non-dairy alternatives like almond or oat milk offer a lighter and plant-based option. For those who prefer their coffee black, the bold flavors of the brew can shine through, allowing the cinnamon and sugar to take center stage.

Experimenting with Spices: Nutmeg, Cardamom, or Cloves

Spice

Experimenting with a variety of spices such as nutmeg, cardamom, or cloves can elevate your cinnamon coffee to new heights. These aromatic additions can bring depth and complexity to the flavor profile, creating a more nuanced and exotic brew. Start by adding a pinch of your chosen spice to the coffee grounds before brewing and adjust the amount to suit your taste preferences. The interplay of different spices can transform a simple cup of coffee into a gourmet experience.

Flavors

Flavors play a vital role in crafting a delicious cinnamon coffee. Whether you prefer a sweeter and creamier brew or a spicier and more aromatic one, finding the right balance is the key to a delightful drinking experience. Don’t be afraid to experiment with different ingredients and ratios to create a signature cinnamon coffee that suits your unique taste preferences. With a little creativity and a dash of courage, you can master the art of balancing flavors and enjoy a truly exceptional cup of cinnamon-infused coffee.

Topping It Off

Many coffee enthusiasts enjoy adding extra flair to their homemade cinnamon coffee to elevate the flavors even further. If you’re looking for inspiration on how to take your cup of joe to the next level, check out this Homemade Cinnamon Coffee Recipe for some delightful ideas.

Whipped Cream and Cinnamon Sprinkle

For a decadent touch, top your cinnamon coffee with a generous dollop of whipped cream and a sprinkle of cinnamon. The light and airy texture of the whipped cream complements the rich flavors of the coffee, while the hint of cinnamon adds a warm and aromatic note to every sip.

Chocolate Shavings or Chips

Cinnamon and chocolate are a classic flavor combination that never fails to please the taste buds. To incorporate this duo into your cinnamon coffee, sprinkle some chocolate shavings or chips on top of your drink. The bittersweet chocolate enhances the sweetness of the coffee and adds a luxurious touch to your morning routine.

Cinnamon and chocolate are a match made in heaven, and when paired with a steaming cup of cinnamon coffee, they create a truly indulgent treat that will satisfy your cravings for something sweet and comforting.

Caramel Sauce Drizzle

The smooth and rich flavor of caramel sauce can take your cinnamon coffee to new heights of deliciousness. Drizzle a swirl of caramel sauce over the whipped cream on top of your coffee for a luxurious finishing touch that will make you feel like you’re indulging in a fancy coffee shop treat right at home.

The addition of caramel sauce not only adds a velvety sweetness to your cinnamon coffee but also creates a visually appealing presentation that is sure to impress your family and friends.

Tips and Variations

Once again, the beauty of cinnamon coffee lies in its versatility. Here are a few tips and variations to enhance your cinnamon coffee experience:

  • Experiment with different types of milk, such as almond or coconut milk, for a dairy-free version.
  • For a stronger cinnamon flavor, try adding a dash of ground cinnamon directly into your coffee grounds before brewing.
  • Sprinkle some cinnamon on top of your whipped cream for an extra burst of flavor and a beautiful presentation.

Perceiving the endless possibilities with cinnamon coffee can truly elevate your morning routine and bring a touch of warmth to your day.

Cinnamon Coffee in the Summer: Iced Coffee Delight

On a hot summer day, a refreshing iced cinnamon coffee can be a delight for the senses. Simply brew a strong batch of cinnamon-infused coffee, let it cool, and pour it over ice. Add some milk or cream, a dash of cinnamon, and a sweetener of your choice for a cool and invigorating treat.

Spiced Cinnamon Coffee: Adding a Pinch of Warmth

On a chilly evening, nothing beats the cozy comfort of a spiced cinnamon coffee. By adding a pinch of nutmeg, cloves, or even a hint of cayenne pepper to your cinnamon coffee, you can create a truly warming experience that will soothe your soul.

For instance, a pinch of nutmeg can add a subtle nuttiness to your drink, while a touch of cayenne pepper can provide a spicy kick that will invigorate your senses.

Cinnamon Coffee Cake: A Delicious Pairing

To complement your cinnamon coffee, consider pairing it with a slice of homemade cinnamon coffee cake. The combination of the warm, spicy flavors of the coffee with the sweet, buttery goodness of the cake is a match made in culinary heaven.

Cinnamon coffee cake is easy to make and can be enjoyed as a breakfast treat or a delightful dessert. The moist cake, swirled with cinnamon and sugar, is the perfect accompaniment to a steaming cup of cinnamon coffee. Cinnamon coffee cake is sure to be a crowd-pleaser and will leave your guests asking for more.

Summing up

From above, making a cinnamon coffee is a simple yet delightful way to elevate your morning routine or enjoy a cozy evening treat. By following the steps outlined in this guide, you can create a flavorful and aromatic beverage that will surely warm your soul.

FAQ

Q: What ingredients do you need to make cinnamon coffee?

A: To make cinnamon coffee, you will need ground coffee, ground cinnamon, water, and your choice of sweetener and creamer.

Q: How do you brew cinnamon coffee?

A: Start by brewing your favorite coffee as you normally would. Then, add a pinch of ground cinnamon to the coffee grounds before brewing. This will infuse the coffee with a delicious cinnamon flavor.

Q: Can you make cinnamon coffee without a coffee maker?

A: Yes, you can make cinnamon coffee without a coffee maker by brewing coffee using a pour-over method or a French press. Simply add ground cinnamon to the coffee grounds before adding hot water.

Q: How much cinnamon should you add to your coffee?

A: The amount of cinnamon you add to your coffee is a matter of personal preference. Start with a small pinch and adjust to taste. Recall, a little goes a long way with cinnamon!

Q: Can you make iced cinnamon coffee?

A: Absolutely! To make iced cinnamon coffee, brew a strong batch of cinnamon coffee, let it cool, pour it over ice, and add your desired sweetener and creamer. It’s a refreshing twist on a classic favorite.

Q: What are some ways to sweeten cinnamon coffee?

A: You can sweeten cinnamon coffee with sugar, honey, maple syrup, or any other sweetener of your choice. Experiment with different options to find the perfect balance of sweetness for your taste buds.

Q: How can you make cinnamon coffee extra fancy?

A: To make cinnamon coffee extra fancy, top it with a dollop of whipped cream and a sprinkle of ground cinnamon or cinnamon sticks for garnish. You can also add a dash of vanilla extract for a luxurious flavor boost.

How do you make a breve

What are the best coffee regions in the world

How does coffee affect sleep

How is cold brew coffee made

What are the origins of coffee

What is a coffee bloom

Most coffee enthusiasts are familiar with the term “bloom” when it comes to brewing their favorite drink, but what exactly is a coffee bloom? In this informative post, we investigate into the science and art behind this crucial step in the coffee brewing process. Understanding the coffee bloom can elevate your coffee-making skills and enhance the flavors in your cup. Let’s explore the magic that happens when hot water meets freshly ground coffee beans.

Key Takeaways:

  • Coffee Bloom: The coffee bloom is the initial phase of the brewing process where hot water interacts with freshly ground coffee.
  • Carbon Dioxide Release: During the bloom, carbon dioxide is released from the coffee grounds, which causes the coffee bed to puff up or rise.
  • Flavor Extraction: The bloom is crucial for flavor extraction as it allows the coffee grounds to degas and prepare for the optimal brewing process.
  • Brewing Consistency: Achieving a proper coffee bloom ensures a more consistent and flavorful extraction, leading to a better cup of coffee.
  • Home Brewing Tips: To enhance your coffee bloom at home, use fresh coffee beans, grind them just before brewing, and pour hot water evenly over the grounds to facilitate a uniform extraction.

Definition and Origins

What is a coffee bloom?

A coffee bloom is a fascinating phenomenon that occurs when hot water is poured over freshly ground coffee beans. This process leads to the release of carbon dioxide gas trapped within the beans, causing them to swell and rise to the surface of the coffee bed. The bloom is characterized by a foamy cap that forms on top of the coffee grounds, creating a visually appealing effect.

Historical roots of coffee blooming

With the rising trend of specialty coffee and a growing interest in the nuances of coffee brewing, the concept of coffee blooming has gained popularity in recent years. However, the practice of blooming coffee grounds has been around for centuries, with roots tracing back to traditional coffee-making methods in various parts of the world. In regions like Ethiopia and Yemen, where coffee cultivation originated, blooming has long been an vital step in the coffee brewing process.

The release of carbon dioxide during the blooming process helps prepare the coffee grounds for extraction by allowing water to saturate more evenly through the bed of coffee. This leads to a more uniform extraction and enhances the flavor profile of the final brew. By understanding the historical significance of blooming in coffee brewing, we can appreciate how this simple yet crucial step has contributed to the rich tapestry of coffee culture worldwide.

The Science Behind Coffee Blooming

You may have noticed that when you pour hot water over freshly ground coffee, bubbles form and the grounds swell. This phenomenon is known as the coffee bloom, and it is a crucial step in the coffee brewing process that releases the coffee’s flavors and aromas.

Chemical reactions during blooming

Blooming occurs when hot water hits the coffee grounds, releasing carbon dioxide trapped in the beans during the roasting process. This release of gas causes the grounds to puff up and creates a bubbly surface. Along with carbon dioxide, other volatile compounds like oils and acids are also released during blooming, contributing to the coffee’s flavor profile.

Role of carbon dioxide in blooming

During blooming, carbon dioxide plays a significant role in pushing out stale carbon dioxide to make way for the fresh water to extract the coffee’s flavors. The release of carbon dioxide also helps in degassing the coffee, allowing for a more even extraction and a better tasting cup of coffee.

Role of carbon dioxide in blooming

In addition to aiding in the extraction of flavors, carbon dioxide also helps to create the characteristic crema on espresso. This layer of emulsified oils sits on top of a well-brewed shot of espresso and is a sign of a good extraction.

How temperature affects blooming

On coffee solubility On gas release
Higher temperatures increase the solubility of coffee compounds, leading to a more flavorful extraction. Hotter water temperatures can accelerate the release of carbon dioxide during blooming, resulting in a more vigorous bloom.

How temperature affects blooming

The temperature of the water used during blooming can impact the rate at which flavors are extracted from the coffee grounds. Warmer water can lead to a faster extraction, while cooler water may result in a more delicate flavor profile.

The Benefits of Coffee Blooming

Improved flavor profile

All coffee lovers know that the flavor of their favorite brew is of utmost importance. The coffee bloom plays a crucial role in enhancing the flavor profile of your cup of joe. When hot water is poured over freshly ground coffee, the gases trapped in the beans are released, allowing for a more even extraction of flavors during the brewing process. This results in a more balanced and flavorful coffee that is a true delight to savor.

Enhanced aroma

One of the most enticing aspects of brewing coffee is the wonderful aroma that fills the air. The coffee bloom significantly enhances this experience by releasing a burst of aromatic compounds as the coffee grounds degas. This burst of aroma is a prelude to the rich and inviting scent that wafts from your freshly brewed cup of coffee, adding to the overall sensory pleasure of the coffee-drinking experience.

Furthermore, the enhanced aroma of bloomed coffee can elevate your morning routine, making it a more enjoyable and indulgent experience.

Increased caffeine extraction

Regarding that morning caffeine boost, the coffee bloom proves to be a valuable ally. The initial release of gases during blooming allows for better saturation of the coffee grounds, leading to increased caffeine extraction during the brewing process. This means that your cup of coffee will not only taste better but also provide you with that extra kick of energy to start your day off right.

Blooming your coffee before brewing ensures that you are making the most of your coffee grounds and extracting all the caffeine they have to offer, giving you a more potent and satisfying cup of coffee.

How to Bloom Coffee

After learning about what a coffee bloom is, you may be curious about how to achieve the perfect bloom when brewing your coffee. Here is a step-by-step guide to help you achieve the optimal bloom:

Step-by-step guide to blooming

Step Instructions
1 Start by grinding your coffee beans to a medium-coarse consistency.
2 Place the coffee grounds into the filter of your coffee maker or pour-over device.
3 Slowly pour hot water over the coffee grounds, ensuring that they are evenly saturated.
4 Allow the coffee grounds to bloom for about 30 seconds before continuing with the brewing process.

Tips for optimal blooming

Stepbystep, here are some additional tips to ensure optimal blooming:

  • Use freshly roasted coffee beans for the best bloom.
  • Ensure your water temperature is between 195-205°F for ideal blooming.

This will help release the trapped carbon dioxide, resulting in a better extraction of flavors from the coffee grounds.

Common mistakes to avoid

Optimal blooming can be affected by common mistakes that coffee enthusiasts often make. It is imperative to be aware of these mistakes to improve your brewing technique:

For instance, using old, stale coffee beans can hinder the blooming process and result in a flat-tasting cup of coffee. Additionally, using water that is too hot or too cold can also impact the blooming process and the overall flavor of the coffee.

Coffee Bloom vs. Coffee Steeping

Key differences between blooming and steeping

Once again, it’s necessary to understand the distinctions between blooming and steeping when it comes to brewing coffee. While blooming refers to the initial process of wetting the coffee grounds to release gases before fully brewing, steeping involves letting the coffee grounds sit in water for an extended period to extract flavors.

When to use each method

Steeping is commonly used in methods like French press or cold brew, where the coffee grounds are fully immersed in water for a longer duration. Blooming, on the other hand, is crucial when brewing with methods like pour-over or Aeropress, where the coffee grounds benefit from the initial release of gases by wetting them before continuing with the brewing process.

With an understanding of when to use each method, you can enhance the flavor and overall experience of your brewed coffee. Experimenting with blooming and steeping techniques can help you tailor your coffee brewing to your preferences, whether you enjoy bright and acidic flavors or a smoother cup.

Comparing flavor profiles

Blooming Steeping
Enhances acidity Produces a fuller body
Allows for a more complex flavor profile Can result in a stronger, bolder flavor

Differences in flavor profiles between blooming and steeping methods can significantly impact the taste of your brewed coffee. Understanding these variations can help you choose the right technique based on your flavor preferences and the type of coffee beans you’re using.

This informative breakdown sheds light on the key differences between blooming and steeping methods when brewing coffee. Each method offers unique advantages in enhancing the flavor profiles of your brew, so experiment with both to find your perfect cup of coffee.

Coffee Bloom in Coffee Culture

Many coffee enthusiasts believe that the coffee bloom is not just a chemical reaction but an integral part of coffee culture. It adds a theatrical element to the coffee-making process, creating an exciting visual and aromatic experience for both baristas and coffee drinkers. The bloom is often seen as a sign of freshness and quality in specialty coffee, where baristas take great care to preserve this crucial stage in the brewing process.

Blooming in coffee ceremonies

With its mesmerizing bubbling and foaming, the bloom has become a highlighted moment in traditional coffee ceremonies around the world. Whether it’s the Japanese art of pour-over brewing or the elaborate Ethiopian coffee ceremony, the bloom symbolizes the beginning of a revered ritual that honors the journey of coffee from bean to cup.

Its role in coffee competitions

Bloom plays a significant role in coffee competitions, where baristas showcase their skills in brewing the perfect cup. A well-executed bloom can set the stage for a remarkable sensory experience, highlighting the flavors and aromas of the coffee beans. Judges often look for a balanced and controlled bloom as a mark of precision and expertise in the competitive world of coffee brewing.

A well-executed bloom can enhance the overall flavor profile of the coffee, bringing out nuanced notes and highlighting the coffee’s unique characteristics. By mastering the bloom, baristas can elevate their craft and deliver exceptional coffee experiences to their customers.

How blooming affects coffee pairing

A proper bloom sets the stage for a successful coffee pairing experience, enhancing the compatibility of coffee with various food items. The release of carbon dioxide during blooming can help cleanse the palate and prepare it for the rich flavors of the coffee, making it an necessary step in creating harmonious coffee pairings.

By understanding how blooming affects the taste and aroma of coffee, enthusiasts and professionals alike can experiment with different brewing methods and coffee pairings to create delightful and satisfying combinations that elevate the coffee-drinking experience.

Summing up

Hence, the coffee bloom is a crucial step in the coffee brewing process that involves releasing trapped gases from freshly roasted coffee grounds, allowing the hot water to extract flavors efficiently. If you want to examine deeper into the topic and understand the science behind blooming, you can check out this informative thread on What does blooming actually do? : r/Coffee. Mastering the bloom can lead to a more flavorful and aromatic cup of coffee, making it a step worth paying attention to for coffee enthusiasts and baristas alike.

FAQ

Q: What is a coffee bloom?

A: A coffee bloom is the process of degassing freshly roasted coffee beans when hot water is poured over them, resulting in the release of carbon dioxide gas.

Q: Why is the coffee bloom important?

A: The coffee bloom is important because it indicates the freshness of the coffee beans and allows for better extraction of flavors during the brewing process.

Q: How does the coffee bloom occur?

A: When hot water is poured over freshly ground coffee beans, the trapped carbon dioxide gas is released, causing the coffee grounds to rise and expand, creating a bloom effect.

Q: How long does the coffee bloom last?

A: The coffee bloom typically lasts for about 30 seconds to a minute, depending on the freshness of the coffee beans and the grind size.

Q: Does all coffee bloom the same way?

A: No, the intensity of the coffee bloom can vary depending on the roast level, freshness of the beans, grind size, and brewing method used.

Q: How can you enhance the coffee bloom?

A: To enhance the coffee bloom, use freshly roasted beans, a coarser grind size, and allow the coffee to degas for a few days after roasting before brewing.

Q: Does the coffee bloom affect the taste of the coffee?

A: Yes, a strong and vibrant coffee bloom can indicate a fresher and more flavorful cup of coffee, as it allows for better extraction of the coffee’s aromatic compounds and flavors.

How do you make a breve

What are the best coffee regions in the world

How does coffee affect sleep

How is cold brew coffee made

What are the origins of coffee

How do you make a bulletproof coffee

Over the years, bulletproof coffee has become a popular choice for those seeking to jumpstart their day with a powerful dose of caffeine and energy. This creamy concoction combines coffee, grass-fed butter, and MCT oil for an indulgent and functional beverage that promises increased focus and sustained energy levels. In this guide, we will break down the steps to create the perfect cup of bulletproof coffee, so you can fuel your day like a pro.

Key Takeaways:

  • High-Quality Ingredients: Start with high-quality coffee beans, grass-fed butter, and MCT oil for the best results.
  • Prepare Coffee: Brew a cup of coffee using your preferred method, ensuring it is strong and flavorful.
  • Combine Ingredients: Blend the hot coffee with grass-fed butter and MCT oil until frothy and well mixed.
  • Enjoy Benefits: Bulletproof coffee is believed to boost energy, cognitive function, and metabolism throughout the day.
  • Personalize Your Brew: Feel free to add sweeteners, spices, or collagen peptides to customize the flavor and benefits of your bulletproof coffee.

The Science Behind Bulletproof Coffee

What makes coffee bulletproof?

Science has shown that adding healthy fats to your coffee can have several benefits. By blending grass-fed butter or ghee and MCT oil into your coffee, you create a drink that sustains your energy levels and helps you feel full for longer. The fats slow down the absorption of caffeine, providing a more gradual energy boost compared to traditional coffee.

The benefits of a fat-based coffee

Makes sure to start with a high-quality coffee, such as organic, single-origin beans, to maximize the benefits of bulletproof coffee. This combination of high-quality coffee, grass-fed butter, and MCT oil can improve mental clarity, support weight loss efforts, and provide a steady energy source without the jitters often associated with caffeine.

This fat-based coffee can also boost your metabolism and help with fat burning, making it a popular choice for those following a ketogenic or low-carb diet. Additionally, the healthy fats in bulletproof coffee can help support brain function and keep you focused throughout the day.

Gathering Ingredients

Choosing the right coffee beans

Little things can make a big difference when it comes to making a delicious bulletproof coffee. Start by selecting high-quality coffee beans that are freshly roasted. Look for beans that are organic, single-origin, and have been sourced responsibly. These factors can impact the taste and quality of your final brew.

Selecting a high-quality fat source

On the right path to creating a fantastic bulletproof coffee, choosing the right fat source is crucial. Opt for high-quality fats like grass-fed butter or ghee, as they can enhance the creamy texture and provide a rich flavor profile to your coffee. These fats also contain necessary nutrients that can boost your energy levels and brain function.

It’s necessary to prioritize quality when selecting your fat source for bulletproof coffee. Using low-quality or processed fats can affect the taste and overall experience of your coffee. Investing in premium fats will ensure that you get the most out of your bulletproof coffee.

Optional: adding flavor and spices

Optional additions such as flavorings and spices can take your bulletproof coffee to the next level. Experiment with ingredients like cinnamon, vanilla extract, or even a dash of cayenne pepper to personalize your drink and enhance its taste profile. These additions can add depth and complexity to your coffee, making each cup a unique experience.

Optional: In terms of adding flavor and spices to your bulletproof coffee, the sky’s the limit. Get creative and tailor your ingredients to suit your taste preferences. Whether you prefer a hint of sweetness from stevia or a kick of spice from turmeric, the choice is yours to create a personalized and flavorful brew.

Preparing the Coffee

Grinding the beans

Coffee beans are at their best when they are freshly ground. To make the perfect cup of bulletproof coffee, start by grinding your coffee beans just before brewing. This will ensure a rich and flavorful experience that is unmatched by pre-ground coffee.

Brewing the perfect cup

Grinding your coffee to the right consistency is key to brewing the perfect cup. A coarse grind is ideal for bulletproof coffee as it allows for maximum flavor extraction without over-extraction that can result in bitterness. To brew the perfect cup, use high-quality filtered water at the right temperature (around 200°F) and a French press or pour-over method for the best results.

Note, the freshness of your coffee beans and the precision of your brewing method will greatly impact the taste of your bulletproof coffee. Experiment with different brewing techniques and beans to find your perfect cup.

Blending with fat

Preparing bulletproof coffee involves blending freshly brewed coffee with a source of healthy fats like grass-fed butter and MCT oil. These fats not only add a creamy texture to your coffee but also provide sustained energy and mental clarity throughout the day. To blend, simply combine your brewed coffee with a tablespoon of butter and a teaspoon of MCT oil in a blender until frothy and well mixed.

Another popular option for blending fats into your bulletproof coffee is using coconut oil or ghee. These alternatives offer a slightly different flavor profile while still providing the same benefits of sustained energy and focus. Experiment with different fats to find the combination that suits your taste preferences the best.

The Art of Blending

After selecting high-quality ingredients for your bulletproof coffee, the next step is mastering the art of blending to achieve that perfect, creamy texture and emulsion that makes this beverage so delicious and satisfying.

Using a blender for a creamy texture

Creamy bulletproof coffee is the result of a well-emulsified blend of coffee, butter, and MCT oil. Using a high-speed blender is important to achieve the creamy texture that will elevate your coffee to the next level. The blender will help emulsify the ingredients, creating a smooth and frothy drink that is both rich and satisfying.

Tips for achieving the perfect emulsion

Blending your bulletproof coffee may seem straightforward, but there are a few tips to keep in mind to achieve the perfect emulsion. Make sure to blend on high speed for at least 30 seconds to thoroughly mix the ingredients. You can also add the ingredients in a specific order to help with the emulsification process. Do not forget, the key to a great bulletproof coffee is a well-emulsified blend that combines all the flavors seamlessly.

  • Use a high-speed blender for best results.
  • Blend on high speed for at least 30 seconds.
  • Experiment with the order of ingredients for optimal emulsification.

Common mistakes to avoid

Perfecting the art of blending for bulletproof coffee requires avoiding common mistakes that can ruin the taste and texture of your beverage. One common mistake is not blending the ingredients for long enough, resulting in a separated and oily drink. Another mistake is using a low-quality blender that fails to emulsify the ingredients properly, leading to a lackluster coffee experience.

Mistakes in the blending process can make or break your bulletproof coffee, so it’s important to pay attention to details and invest in the right equipment to achieve that perfectly emulsified and creamy texture that makes this beverage so special.

Customizing Your Bulletproof Coffee

Despite the detailed instructions provided in How to Make Bulletproof Coffee (Easy Steps), making bulletproof coffee offers room for customization according to your preferences and taste buds. Here are a few ways you can personalize your bulletproof coffee to suit your liking.

Adding sweetener or creamer alternatives

One of the beauties of bulletproof coffee is that you can tailor it to your taste. Instead of traditional sweeteners like sugar or artificial creamers, you can explore healthier alternatives like stevia, monk fruit sweetener, or nut-based creamers. These alternatives can enhance the flavor of your coffee while keeping it low-carb and keto-friendly.

Experimenting with different flavor profiles

Profiles

For those looking to elevate their bulletproof coffee experience, experimenting with different flavor profiles can be a game-changer. You can add spices like cinnamon or nutmeg, flavored extracts like vanilla or almond, or even a dash of cocoa powder to create a unique and delicious concoction. These flavor additions can help you discover new dimensions of taste in your morning cup of bulletproof coffee.

Making it a ritual: creating a morning routine

With

With the busy pace of modern life, creating a morning ritual can offer a sense of calm and structure to your day. Incorporating the preparation of bulletproof coffee into your morning routine can help you start each day with intention and mindfulness. Whether it’s savoring each sip of your coffee while journaling, meditating, or simply enjoying a few moments of peace before the day begins, making bulletproof coffee a part of your morning ritual can set a positive tone for the rest of the day.

Troubleshooting Common Issues

Dealing with oil separation

To address oil separation in your bulletproof coffee, try blending your ingredients for a longer period. Sometimes, the oils from the butter or coconut oil can separate if not fully emulsified. Ensure that you blend the coffee, butter, and MCT oil together for at least 30-60 seconds to create a creamy and well-mixed beverage.

Fixing a too-thin or too-thick consistency

For a too-thin consistency, try adding more butter or coconut oil to the mixture and blending again. If your bulletproof coffee is too thick, consider adding a splash of hot water or brewed coffee to thin it out to your desired consistency. Be mindful of, the perfect bulletproof coffee consistency is a personal preference, so feel free to adjust the ingredients to suit your taste.

For those who prefer a lighter consistency, you can experiment with reducing the amount of butter or coconut oil in your recipe. Alternatively, increasing the amount of coffee or hot water can help achieve a thinner texture. Don’t be afraid to customize your bulletproof coffee to find what works best for you!

Addressing digestive discomfort

Troubleshooting digestive discomfort from bulletproof coffee can involve adjusting the amount of MCT oil used. Start with a smaller amount and gradually increase it as your body adjusts to the medium-chain triglycerides. Additionally, make sure to drink your bulletproof coffee slowly and not on an empty stomach to help prevent any digestive issues.

Dealing with digestive discomfort may also include choosing high-quality ingredients for your bulletproof coffee. Opt for grass-fed butter and MCT oil without additives or fillers to ensure optimal digestion. Issues with digestive sensitivity can vary from person to person, so listen to your body and make adjustments accordingly to enjoy your bulletproof coffee without any discomfort.

To wrap up

Taking this into account, making a bulletproof coffee is a simple and straightforward process that can be easily incorporated into your daily routine. By following the steps outlined in this guide, you can enjoy a delicious and nutritious drink that will help you stay focused and energized throughout the day.

Remember to start with high-quality ingredients, such as organic coffee beans, grass-fed butter, and MCT oil, to ensure that you are getting the full benefits of your bulletproof coffee. Experiment with different ratios and ingredients to find the perfect combination that suits your taste preferences. With a little practice, you’ll be able to make a delicious and satisfying bulletproof coffee that will kickstart your day the right way.

FAQ

Q: What is Bulletproof coffee?

A: Bulletproof coffee is a drink that consists of coffee, grass-fed butter, and MCT oil or coconut oil. It’s known for providing sustained energy and mental clarity.

Q: What are the benefits of drinking Bulletproof coffee?

A: Bulletproof coffee can help increase energy levels, improve focus and concentration, and support weight loss by promoting satiety.

Q: How do you make Bulletproof coffee?

A: To make Bulletproof coffee, brew a cup of high-quality coffee, add 1-2 tablespoons of grass-fed butter, and 1-2 tablespoons of MCT oil or coconut oil. Blend until frothy.

Q: What type of coffee is best for Bulletproof coffee?

A: It’s recommended to use high-quality, organic coffee beans for Bulletproof coffee to maximize the benefits and taste of the drink.

Q: Why use grass-fed butter in Bulletproof coffee?

A: Grass-fed butter is rich in vitamins, minerals, and healthy fats like omega-3s and CLA, which can provide a sustained release of energy when combined with coffee.

Q: Can I customize my Bulletproof coffee?

A: Yes, you can customize your Bulletproof coffee by adding ingredients like collagen powder, cinnamon, vanilla extract, or sweeteners like stevia or erythritol to suit your taste preferences.

Q: When is the best time to drink Bulletproof coffee?

A: Bulletproof coffee is often consumed in the morning as a replacement for breakfast or as a pre-workout drink to boost energy and focus. It’s best enjoyed on an empty stomach.

How do you make a breve

What are the best coffee regions in the world

How does coffee affect sleep

How is cold brew coffee made

What are the origins of coffee

How do you make a frappe

With a few simple ingredients and a little bit of patience, you can whip up a delicious frappe right in your own kitchen. This icy, frothy beverage is the perfect treat for a hot summer day or whenever you need a little pick-me-up. So put on your apron, grab your blender, and let’s get started on making your own refreshing frappe at home! It’s easier than you think, and oh so worth it.

Key Takeaways:

  • Quality Ingredients: Start with high-quality coffee, milk, sugar, and ice for a delicious frappe.
  • Blending Technique: Blend the ingredients until smooth and creamy for the perfect consistency.
  • Creative Flavors: Experiment with different flavorings like chocolate, caramel, or vanilla to customize your frappe.
  • Garnish and Serve: Top your frappe with whipped cream, chocolate shavings, or a drizzle of syrup for an elegant presentation.
  • Enjoy Responsibly: Indulge in your homemade frappe as a delightful treat, perfect for a relaxing afternoon or a special occasion.

Gathering Ingredients and Equipment

Essential Ingredients for a Classic Frappe

The key to a delicious frappe lies in its simple yet vital ingredients. To start off, you’ll need high-quality instant coffee or espresso powder. This will be the base of your frappe and determine the strength of the coffee flavor. Next, make sure you have some sugar on hand to sweeten the drink to your liking. Additionally, don’t forget about milk or cream, which helps create that creamy and smooth texture that defines a classic frappe.

Specialized Equipment You’ll Need

An vital piece of equipment for making a frappe is a blender. This will help you achieve that perfect frothy and well-blended consistency that sets a frappe apart from a regular cup of coffee. Additionally, having some ice cubes ready to go is crucial for creating that refreshing and slushy texture that makes a frappe so delightful.

For instance, using a high-speed blender will ensure that all the ingredients are thoroughly mixed and that the ice is perfectly crushed, resulting in a smooth and velvety frappe. If you want to step it up a notch, having some whipped cream and flavored syrups on hand can take your frappe to the next level, adding a touch of indulgence to your coffee treat.

Preparing the Coffee Base

Brewing the Perfect Cup of Coffee

Clearly, the key to a delicious frappe lies in the quality of the coffee base. To brew the perfect cup of coffee, start with high-quality coffee beans that are freshly ground. Use a coffee maker to brew a strong batch of coffee, as the flavor will be diluted once the ice is added. Ensure the coffee is brewed to your desired strength, as this will impact the overall flavor of your frappe.

Chilling the Coffee for the Frappe

To chill the coffee for the frappe, allow the freshly brewed coffee to cool to room temperature. Then, transfer it to a container and refrigerate until thoroughly chilled. It’s imperative to use cold coffee when making a frappe as it will prevent the drink from becoming watered down when the ice is blended in.

With the coffee base properly brewed and chilled, you are well on your way to creating a delightful frappe that will satisfy your cravings for a refreshing and caffeinated treat.

Blending the Frappe

Keep the blender ready as you move on to blending the perfect frappe. Blending is where all the magic happens, turning simple ingredients into a delightful and refreshing drink that will energize your day.

Combining the Coffee, Ice, and Milk

Combining freshly brewed coffee, ice, and milk forms the base of your frappe. Start by adding strong coffee into the blender – the richness of the coffee will be the soul of your frappe. Next, comes the ice – it’s important for that slushy, icy texture that makes a frappe so satisfying. Finally, pour in some cold milk, which adds creaminess and balances the flavors. Now, you’re ready to blend!

Tips for Achieving the Perfect Blend

  • Ensure your coffee is chilled before blending for a more refreshing frappe.
  • Adjust the sweetness to your preference by adding sugar or flavored syrup.

On understanding the importance of achieving the perfect blend, you must pay attention to the consistency. The key to a great frappe lies in finding the right balance between the coffee intensity, creaminess from milk, and the icy texture from the ice. Thou should adjust the ingredients and blending time to suit your taste preferences for the best results.

Adding Flavor and Texture

Introducing Flavorings and Syrups

After you have blended your coffee concoction to creamy perfection, it’s time to add some pizzazz with flavorings and syrups. For an indulgent touch, consider drizzling in some caramel or chocolate syrup. If you prefer a fruity twist, why not add a splash of raspberry or coconut flavoring? The possibilities are endless, so don’t be afraid to get creative and experiment with different combinations to find your signature frappe flavor.

Whipped Cream and Toppings Galore

Whipped cream and toppings take your frappe to the next level, transforming it from a simple drink to a decadent dessert. For the classic touch, add a generous dollop of whipped cream on top of your frappe. Then, the real fun begins – sprinkle on some chocolate shavings, crushed nuts, or colorful sprinkles. Want to really up the ante? Why not add a cookie, a drizzle of fudge, or a cherry on top? Let your imagination run wild, and create a visually stunning and delicious treat that will dazzle your taste buds.

Whipped cream and toppings are not just for aesthetics – they also provide interesting textures and flavors that complement the creamy base of the frappe. The light and airy whipped cream adds a velvety smoothness, while the toppings offer a delightful crunch or burst of flavor with each sip. By playing with different combinations of toppings, you can customize your frappe to suit your mood and cravings, making each sip a delightful adventure.

Assembling the Frappe

Despite the simplicity of a frappe, assembling one involves a touch of finesse to make it visually appealing and enticing before you take the first sip. The presentation of your frappe can elevate the entire experience, making it even more enjoyable.

Layering the Ingredients for Visual Appeal

Layering the ingredients in your frappe can create a beautiful ombre effect that not only looks stunning but also enhances the flavor experience. To achieve this, start by adding a generous amount of ice cubes as the base, followed by slowly pouring in your prepared coffee or flavored syrup. Then gently mix in the milk or cream to create distinct layers. The final touch is adding a dollop of whipped cream on top to give your frappe a luscious finish.

Garnishing with Fresh Fruits or Herbs

Fruits can bring a burst of freshness and a pop of color to your frappe, making it visually appealing and adding a hint of natural sweetness. Garnishing your frappe with sliced strawberries, blueberries, or a twist of citrus not only makes it Instagram-worthy but also adds a delightful contrast of textures to every sip.

With a sprinkle of chopped mint leaves or a few edible flowers as a garnish, you can elevate the presentation of your frappe to a whole new level, turning a simple drink into a work of art that tickles both the taste buds and the eyes.

Experimenting with Variations

For Easy Frappe Recipe (blended or shaken) VIDEO, why not try experimenting with different coffee roasts and beans to add unique flavors to your frappe? Roasts like medium, dark, or even flavored coffees can provide a delightful twist to your classic frappe recipe. You might discover new depths of flavor and richness that will elevate your drink to a whole new level of deliciousness.

Trying Different Coffee Roasts and Beans

Experimenting with various coffee roasts and beans can bring a whole new dimension to your frappe experience. Whether you prefer the boldness of a dark roast or the smoothness of a medium roast, each type can infuse its own distinct flavor profile into your frappe. Try different combinations to find your perfect blend and enjoy a customized frappe that suits your taste preferences.

Incorporating Boozy Additions for Adults

Additions like a splash of your favorite liqueur or a shot of espresso vodka can transform your frappe into a decadent treat for adults. These boozy additions can provide a sophisticated twist to your drink, making it perfect for special occasions or a relaxing evening indulgence. Be sure to experiment with different liquors and flavor combinations to create a signature boozy frappe that will impress your guests and tantalize your taste buds.

Boozy frappes are a great way to elevate your beverage game and add a touch of indulgence to your drink. The addition of spirits like Irish cream, coffee liqueur, or flavored vodka can complement the coffee base of the frappe and create a delightful fusion of flavors. Whether you’re hosting a gathering or simply treating yourself, a boozy frappe is sure to add a touch of elegance and sophistication to your drink repertoire.

Vegan and Dairy-Free Frappe Options

On the quest for a vegan or dairy-free frappe option? You can easily swap out dairy milk for almond, coconut, soy, or oat milk to cater to dietary preferences or restrictions. These non-dairy alternatives can provide a creamy texture and delicious flavor to your frappe without compromising on taste. You can also explore options like vegan whipped cream or dairy-free chocolate syrups to customize your frappe and make it vegan-friendly.

It’s easy to make a vegan or dairy-free frappe by simply replacing dairy ingredients with plant-based alternatives. With the growing popularity of veganism and dairy-free diets, there are now a plethora of options available to create a delicious and satisfying frappe that meets your dietary needs. Whether you’re lactose intolerant, vegan, or simply looking to try something new, incorporating vegan and dairy-free options into your frappe can open up a world of possibilities for a refreshing and guilt-free treat.

To wrap up

Now that you’ve followed these simple steps, you should have a delicious frappe ready to enjoy. Making a frappe doesn’t have to be complicated – with just a few ingredients and a blender, you can create a refreshing drink that’s perfect for warm weather or anytime you need a pick-me-up. So go ahead, experiment with different flavors, toppings, and garnishes to make your frappe uniquely yours. Happy blending!

FAQ

Q: What is a frappe?

A: A frappe is a cold and refreshing blended drink made with coffee, milk, flavorings, and ice.

Q: What ingredients do I need to make a frappe?

A: To make a frappe, you will need coffee, milk, sugar, ice, and any additional flavorings of your choice, such as vanilla extract or chocolate syrup.

Q: How do I make a basic frappe?

A: To make a basic frappe, simply blend together cold coffee, milk, sugar, and ice until smooth and frothy.

Q: Can I customize my frappe with different flavors?

A: Absolutely! You can personalize your frappe by adding flavorings such as caramel, mocha, hazelnut, or even a hint of cinnamon.

Q: What equipment do I need to make a frappe?

A: You will need a blender to properly mix and blend the ingredients together to create a smooth and creamy frappe.

Q: How can I make a vegan frappe?

A: To make a vegan frappe, simply substitute dairy milk with plant-based milk alternatives such as almond milk, soy milk, or coconut milk.

Q: Can I make a decaffeinated frappe?

A: Yes, you can make a decaffeinated frappe by using decaf coffee or espresso in place of regular coffee, allowing you to enjoy this delicious drink any time of day.

How do you make a breve

What are the best coffee regions in the world

How does coffee affect sleep

How is cold brew coffee made

What are the origins of coffee

What are some popular coffee brewing methods

Most mornings start with a hot cup of coffee, but have you ever wondered about the different brewing methods that bring this beloved beverage to life? From classic French press to trendy pour-over, this blog post will take you on a caffeinated journey through some popular coffee brewing techniques. So grab your favorite mug, sit back, and let’s explore the world of coffee brewing!

Key Takeaways:

  • French Press: This method involves steeping coarsely ground coffee in hot water for about 4 minutes before pressing down the plunger to separate the grounds from the brewed coffee.
  • Chemex: Using a thick paper filter, this method involves pouring hot water over medium-coarse coffee grounds in a Chemex brewer, resulting in a clean and bright cup of coffee.
  • Aeropress: With a quick and efficient process, the Aeropress involves steeping coffee grounds in water for a short period before pushing the brew through a filter with a plunger.
  • Pour-Over: This method involves pouring hot water over coffee grounds in a filter suspended over a carafe, allowing for a controlled and precise extraction of flavors.
  • Espresso: Using high pressure to force hot water through finely ground coffee, the espresso method results in a concentrated and intense coffee brew perfect as a shot or for espresso-based drinks.

David Sedaris would likely find humor in the precision and variety of coffee brewing methods available, poking fun at the intricacies of each process while still appreciating the unique flavors they produce.

Drip Brewing

A Coffee Basics: Brewing Methods guide provides an excellent overview of the various ways to brew coffee, including the classic method of drip brewing.

The Classic Method

Classic drip brewing involves pouring hot water over ground coffee beans set in a filter. The water then drips through the grounds and filter into a carafe or pot below. This method is popular for its simplicity and ability to brew multiple cups at once, making it perfect for gatherings or offices.

Pros and Cons of Drip Brewing

Pros Cons
Convenient and easy to use May not extract as much flavor as other methods
Great for making multiple cups at once Requires paper filters which can be wasteful
Consistent results Not as customizable as other brewing methods

Drip brewing is a popular method due to its convenience and the ability to make several cups at once. However, some coffee enthusiasts feel that it may not extract as much flavor as other brewing methods. Additionally, the use of paper filters in drip brewing can be seen as wasteful. Despite these drawbacks, the consistent results and ease of use make drip brewing a favorite for many coffee drinkers.

French Press

You may have heard of the French Press coffee brewing method, which is beloved by many coffee enthusiasts. If you’re curious to explore more brewing methods and hear about people’s favorites, head over to What’s your favorite brewing method? : r/Coffee for some great suggestions and recommendations.

The Rich Flavor Method

French Press coffee is known for its rich and full-bodied flavor. This brewing method involves steeping coarsely ground coffee beans in hot water for a few minutes before pressing down a metal or mesh filter to separate the grounds from the liquid. The result is a flavorful and robust cup of coffee that retains the coffee’s natural oils and sediments for an intense taste experience.

Tips for Perfect French Press Coffee

Perfecting your French Press technique can elevate your coffee experience. To start, use a coarse grind to prevent sediment from passing through the filter. Water temperature is crucial, so aim for around 200°F for optimal extraction. Let your coffee steep for about 4 minutes before plunging the filter slowly. The slow and steady press helps to extract flavors evenly without over-extraction, resulting in a balanced and flavorful brew.

  • The plunger should be pressed down slowly and steadily to avoid over-extraction.
  • Using freshly ground coffee beans will enhance the flavor profile of your French Press coffee.

Perfect your French Press technique with these handy tips to enjoy a delicious and aromatic cup of coffee every time. The key is to experiment with different coffee beans, grind sizes, and steeping times to find the perfect balance that suits your taste preferences.

  • French Press coffee is best enjoyed freshly brewed to savor the full flavor profile of the beans.

To truly appreciate the intricate flavors and aromas of coffee, the French Press brewing method offers a delightful experience for coffee connoisseurs and casual drinkers alike. With a bit of practice and these helpful tips, you’ll be able to create a delicious cup of French Press coffee that’s sure to impress your taste buds.

Espresso

For the coffee connoisseur seeking a quick, intense caffeine fix, espresso is the go-to brewing method. This strong and flavorful coffee is brewed by forcing hot water through finely-ground coffee beans at high pressure, resulting in a concentrated shot of rich and bold flavor.

The Strong and Bold Method

Espresso is not for the faint of heart – it packs a punch with its robust taste and high caffeine content. The brewing process for espresso is faster than other methods, taking only 25-30 seconds to extract the perfect shot. The result is a velvety and intense coffee that can be enjoyed on its own or used as a base for popular espresso-based drinks like lattes, cappuccinos, and macchiatos.

Essential Equipment for Espresso Brewing

The key to brewing a perfect espresso lies in having the right equipment. A high-quality espresso machine is necessary for creating the right amount of pressure to extract the coffee’s full flavor. In addition to a good espresso machine, a quality grinder is crucial for achieving the fine grind size necessary for espresso brewing. Lastly, a tamper is needed to evenly pack the coffee grounds into the portafilter, ensuring a consistent and even extraction.

To elevate your espresso brewing experience, consider investing in a milk frother for creating creamy froth to top off your lattes and cappuccinos. With the right equipment and a bit of practice, you can master the art of brewing the perfect espresso shot right in your own kitchen.

Pour-Over

The Artisanal Method

With the pour-over method, coffee brewing becomes an artisanal experience. Each step in the process is meticulously controlled, from the water temperature to the speed of the pour. This method allows coffee lovers to fully immerse themselves in the craft of coffee making, resulting in a rich and flavorful cup of joe.

Pour-Over Techniques for Beginners

One of the most popular pour-over techniques for beginners is the Hario V60. This cone-shaped dripper offers a simple yet effective way to brew coffee. All you need is the dripper, filter, coffee grounds, and hot water. Simply place the dripper over your mug, add the filter and grounds, then slowly pour hot water over the grounds in a circular motion. It’s a great way to dip your toes into the world of pour-over coffee brewing.

A key tip for beginners is to experiment with different coffee-to-water ratios and grind sizes to find the perfect balance for your taste preferences. Don’t be afraid to tweak the variables until you discover your ideal cup of pour-over coffee.

Chemex

The Clean and Balanced Method

Not all coffee brewing methods are created equal, but the Chemex is definitely one of the standouts. Methodically designed, this brewing method produces a clean and balanced cup of coffee that coffee enthusiasts rave about. The Chemex is known for extracting the coffee’s flavors while leaving behind any bitterness or sediment, resulting in a crisp and pure coffee experience.

Chemex vs. Pour-Over: What’s the Difference?

The Chemex and pour-over methods are often compared due to their similarities, but there are key differences that set them apart. The main distinction lies in the design of the brewers – the Chemex features a thick paper filter that results in a cleaner cup, while pour-over methods typically use a thinner filter that allows more oils and sediment to pass through.

Clean and crisp, the Chemex brews a lighter, more delicate cup compared to the bolder, heavier profile of pour-over coffee. This makes the Chemex an ideal choice for those who prefer a cleaner taste and smoother texture in their coffee.

Cold Brew

The Smooth and Low-Acidity Method

All the rage in the coffee world, cold brew is a method that involves steeping coarsely ground coffee beans in cold water for an extended period, usually 12-24 hours. The result is a smooth, flavorful coffee with lower acidity than hot-brewed coffee. This method is perfect for those who find traditional coffee to be too bitter or acidic, as the slow extraction process produces a milder, more delicate flavor profile.

Cold Brew Coffee: A Summer Favorite

The go-to summer beverage for coffee lovers, cold brew is a refreshing and energizing pick-me-up on hot days. Its chilled serving temperature and naturally sweet taste make it a delightful alternative to hot coffee during the sweltering summer months. Cold brew can be enjoyed black, with milk, or over ice, offering a versatile coffee experience that caters to various preferences.

Brewing cold brew at home is relatively simple, requiring only a few basic tools like a large container, a fine mesh strainer, and some patience. By experimenting with different brew times and coffee-to-water ratios, you can tailor your cold brew to suit your taste preferences, whether you prefer a strong concentrate or a lighter, more diluted version.

The Aeropress: A Popular Coffee Brewing Method

Unlike traditional brewing methods that rely on gravity to extract flavors from coffee grounds, the Aeropress is a unique device that uses air pressure to brew a delicious cup of coffee. This innovative method results in a smooth and rich flavor profile that coffee enthusiasts appreciate.

The Versatile and Portable Method

With its compact and lightweight design, the Aeropress is not only easy to use but also perfect for coffee lovers on the go. Whether you’re camping in the wilderness or traveling to a different city, the Aeropress allows you to enjoy a quality cup of coffee wherever you are. Its versatility extends to the types of coffee it can brew – from a strong espresso-style shot to a smooth americano, the Aeropress can cater to a range of preferences.

Aeropress Hacks for Better Coffee

Better

Want to elevate your Aeropress coffee game? There are several hacks you can try to enhance the flavor and quality of your brew. From adjusting the brewing time to experimenting with different grind sizes, small tweaks can make a big difference in the final cup of coffee. Additionally, playing around with water temperature and coffee-to-water ratio can help you customize your coffee to suit your palate.

Hacks: For a bolder flavor, try using a finer grind and increasing the brewing time slightly. This can extract more flavors from the coffee grounds and result in a stronger cup of coffee. Alternatively, if you prefer a milder brew, opt for a coarser grind and a shorter brewing time.

Summing up

Ultimately, there are numerous popular coffee brewing methods to suit every coffee lover’s taste. Whether you prefer the simplicity of a drip coffee maker, the elegance of a French press, the convenience of a Keurig machine, or the rich tradition of espresso, there is a brewing method out there for you. Each method offers a unique experience and allows you to customize your coffee to your preferences. So, why not try out a few different methods and see which one becomes your new favorite way to enjoy your daily cup of joe?

FAQ

Q: What are some popular coffee brewing methods?

A: There are several popular coffee brewing methods, including drip brewing, French press, pour-over, espresso, and cold brew.

Q: How does drip brewing work?

A: Drip brewing involves hot water being poured over coffee grounds in a paper or metal filter, allowing the coffee to drip into a pot below.

Q: What is the French press brewing method?

A: The French press method involves steeping coarsely ground coffee in hot water for a few minutes before pressing down a plunger to separate the grounds from the coffee.

Q: How does pour-over brewing differ from drip brewing?

A: Pour-over brewing involves manually pouring hot water over coffee grounds in a filter, allowing for more control over the brewing process compared to automatic drip machines.

Q: What sets espresso brewing apart from other methods?

A: Espresso brewing uses high pressure to force hot water through finely ground coffee, resulting in a concentrated and bold flavor profile that’s popular for making lattes and cappuccinos.

The Ultimate Guide to Brewing the Perfect Cup of Black Coffee at Home